The dynamic of the word is changing rapidly day-by-day and so as the digital facts are changing. Nowadays the photos in the business world are playing a vital role if the business is related to the photos. There was a time when there was no way of making the photos look better post photography. But now, it has changed. Photo editing has changed the entire dynamic of the photography industry. If you own an e-commerce industry, you need to showcase your products with various colors. It is time-consuming as well as cost-effective, to get rid of it, photo editing techniques are there. There are many photo editing companies which are providing some amazing photo editing services such as clipping path service, background removal, photo retouching, color correction, photo manipulation etc.
You may not know how to remove the background of your photo, or you may not know how to retouch photos, you can learn them by yourself or you can take help from any photo editing company. In this article, we are going to show you how you can change the color of the cloth in using a very simple technique.
Here is the technique by which you can change the color of cloths.
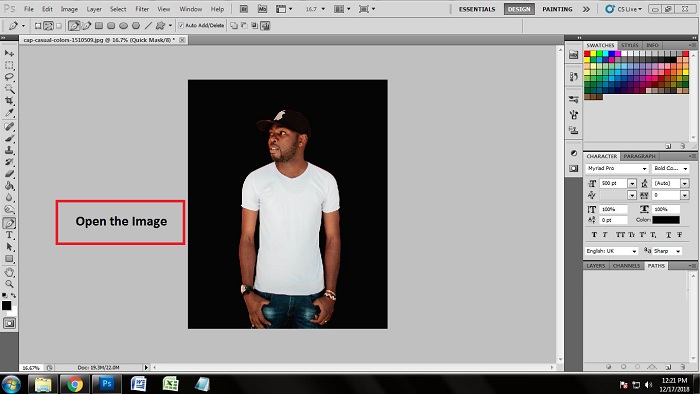
Open the Image
Editing photos in Photoshop vary from editing types. No matter what kind of photo editing you are going to do, you cannot do that without opening the photo in Photoshop.
So the first thing you have to do is to open the photo in Photoshop. Since we will change the color of the cloth in Photoshop, we need to open the required image we want to work on. There are 2 ways of opening the image in Photoshop. Both the ways are pretty simple. The first way is open Photoshop. Go to File>Open. You will get a dialogue box by doing that. Select your required image from windows and press ‘enter’. The photo will be opened in Photoshop.
The other way is way too easy. Go to your computer and search where your required photo is. Open Photoshop. Remember, Photoshop should remain open. Drag that photo to the Photoshop and your photo will be opened automatically.
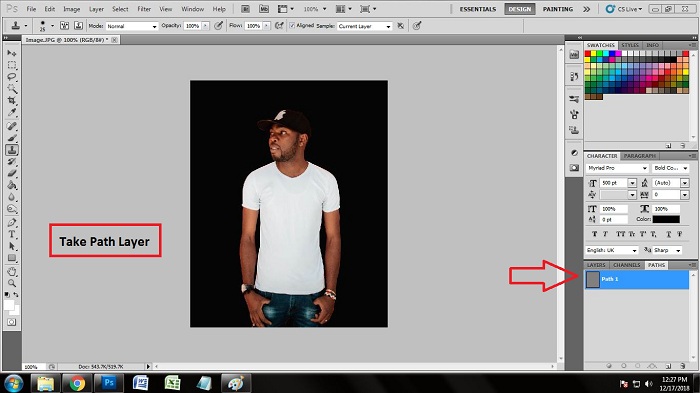
Take Path Layer
The work begins right after opening the image in Photoshop. Although we are going to change the color of the t-shirt, we must go through one photo editing technique which is clipping path. But you cannot do clipping path without taking the path layer. There are multiple layers in Photoshop which helps you to do different editing using Photoshop. Path layer is one of the layers which help you to do a particular editing
We have to draw a clipping path in the Path layer. To take the path layer, go to the layer panel and click path. You will get another box. Now go down and click on the square icon next to delete option from the right. You will get a path layer by doing that.
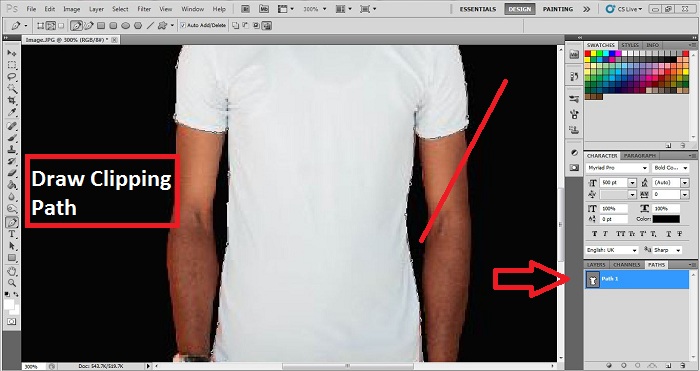
Create Clipping Path
As we have already taken the path layer, we are going to create a clipping mask on the path layer. When we remove the background, we draw the clipping path over the entire subject. But here, we are going to do a slightly different thing.
We have to draw the clipping path just over the t-shirt we want to change the color of. To do that, we need to select the best tool for drawing clipping path. Here, we have selected the pen tool. It is the most reliable tool to draw a clipping path. To activate the pen tool, press ‘p’ on the keyboard or click on the pen icon from the toolbar of Photoshop. After activating the pen tool, start drawing clipping path over the t-shirt. You have to be very careful while doing so. So cannot cut any part of the t-shirt or you cannot include anybody portion too. So you have to do that very carefully. Close the anchor points after creating a clipping path over the t-shirt.
Make the Selection
It is pretty a common thing in Photoshop to make the selection after drawing the clipping path over a subject. Here we will do the same in order to change the color of the cloth. As we are done successfully drawing the clipping path, now it is time to make the selection of the masked area. To make the selection, click on the path layer we have worked on. Now press ‘ctrl+enter’ which will enable the selection of the path area of the photo. You will see many dots moving around your selected area. That indicates that the path you have worked on has been selected.

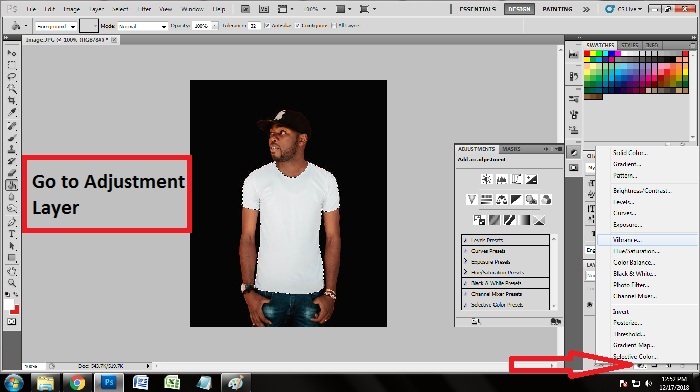
Select Adjustment Layer
There are different ways of adjusting the color. It is actually called a color correction. We can choose several tools for adjusting the color of the cloth. But here we have chosen an adjustment layer for changing the color of the cloth.
An adjustment layer is the tool where you will get many other sub-tools which will give you many variations of color adjustment tools. Go to the layer panel again and click on the circular sign from the bottom 4th. Clicking on that you will get a number of other options. That is how you can activate the adjustment layer.
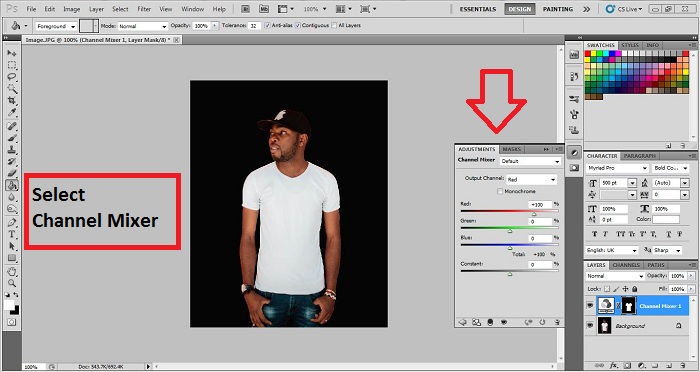
Select Channel Mixer
After clicking on the adjustment layer, you will get many other tools. Each tool works in a different way in terms of putting colors. As we are going to put a solid color into the t-shirt we have selected, I think the best tool would be the ‘Channel Mixer’ tool. So click on the channel mixer tool from adjustment layer box. From the channel mixer, you can actually mix the color on your clothes naturally which will look real. There are also solid color options too but that may not give you the intensity like using the channel mixer.
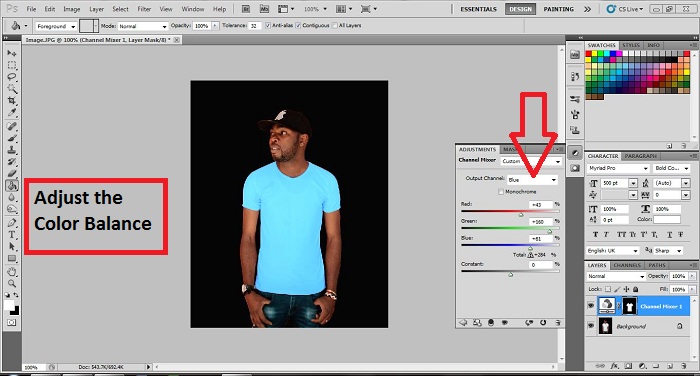
Adjust the Color balance
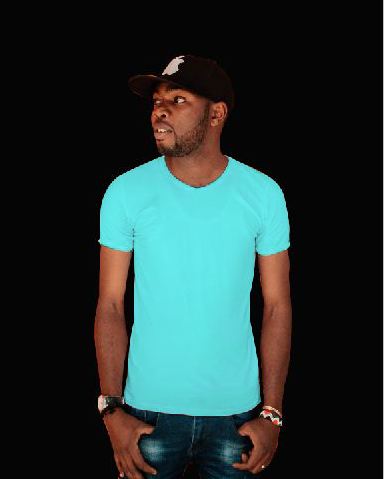
After selecting the channel mixer, you will get a navigation box where you will see some sliders. The sliders or the navigation box actually helps you to choose the color and adjust the color balance of the photo. At first, select the output channel on from the top. I have selected blue as the color of the t-shirt. So when you will click on the output channel, click on your required color. As you can see 3 sliders down the box, we need to use the sliders to adjust the color in the right way. I have used the sliders over and over again and adjusted the color which looks real. Do not overdo the slider so that you do not get the real color balance. Press enter after you get your required color.
Conclusion
This is a very effective way of changing the color of the cloths in Photoshop. Many photo editing companies and many clothing industries use this technique to save their time and money. If you are a beginner and you know a bit of Photoshop, you can easily apply this color correction technique in your clothing photographs. There are many other ways of color adjustment but I have discussed the simplest way of changing your clothes color. So what are you waiting for? Start exploring Photoshop and change the color of your clothes on your own.