Adobe and its invention have greatly helped many industries of this planet. Specially the marketing and Photography sector has experienced a fast growth for Adobe. Photoshop is without a doubt a miracle for these fast growing industries.
E-commerce websites, Product or service businesses, Photographers, etc are using Adobe Photoshop to showcase their services and products. They are showcasing them in the form of web banners, leaflets and photos, etc.
Many famous e-commerce businesses like Amazon, E-Bay, Ali express, etc are using various sorts of images with different type of effects to it. They are Retouching jewelry in Photoshop or they are planning to Change Photo Background to White Using Photoshop for increasing conversion.
Some are using 360 degree images for attracting more customers. Creating a 360 degree image using Photoshop is very easy. To learn 360 degree product image editing you can check this article below –
How to edit 360 Degree photos in Photoshop
There is another valuable way of highlighting your product images for better conversion using Photoshop. This image editing technique is known as Mirror reflection. This technique helps us to create a reflection of the product on the plane it is placed on. This method gives the product an original look. Customers love such product images and they also end up buying the product.
In this article we’ll show you the technique used to make a mirror reflection in Photoshop. So, without waiting further let’s start!
Opening the Image in Photoshop
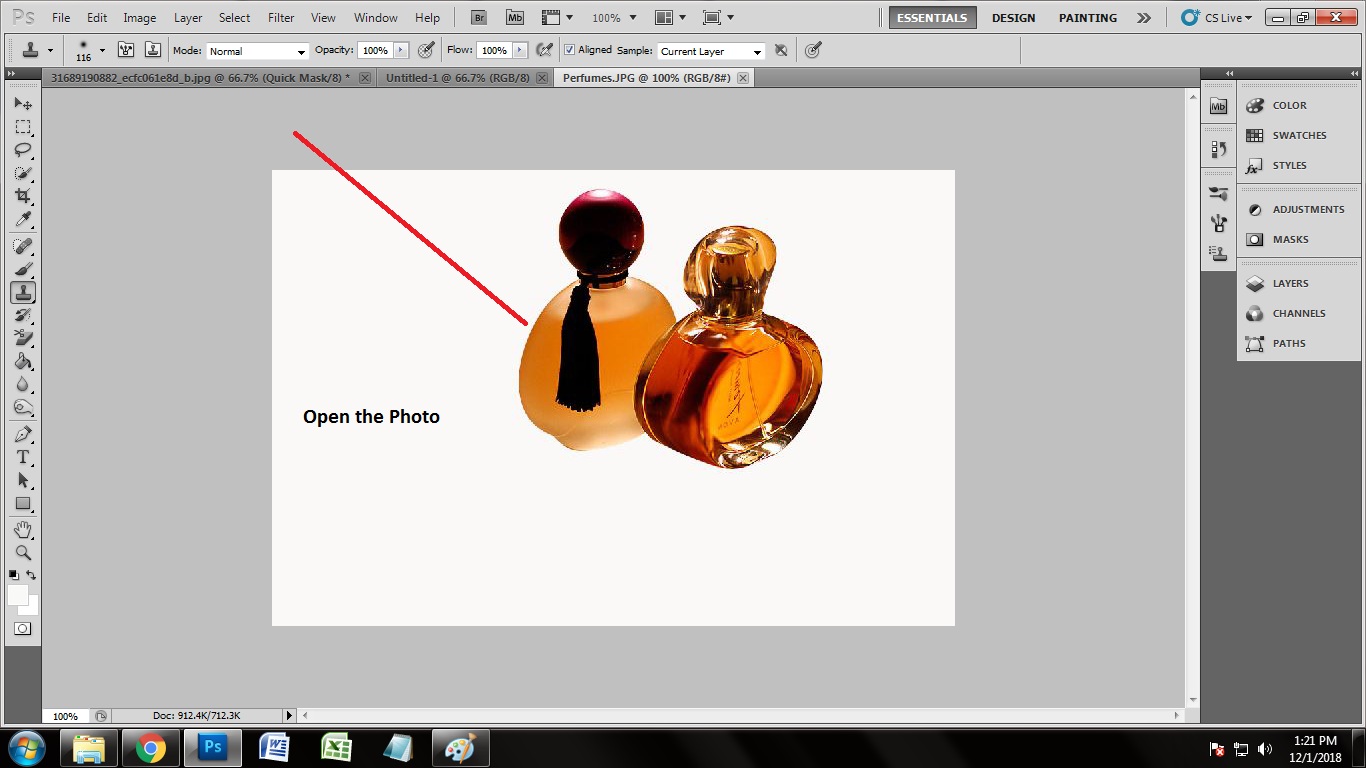
When we want to edit the photos in Photoshop, we need to open or import the photo in Photoshop at first. So to add reflection shadow in Photoshop, the first thing is opening the image. Opening the photo in Photoshop is quite obvious, isn’t it? In the language of Photoshop, opening the image is also known as importing the photo in Photoshop. I’m saying the thing because importing word may sound confusing if you are a beginner. So without further adieu, let’s start the first step
In this step, we are going to discuss and show how you can open an image in Photoshop. Well, nothing can be easier than this. To import the photo in Photoshop, there are simple ways. Manual and automatic are the two ways of opening the image in Photoshop. In the manual process of importing the photo, you have to open the Photoshop and go to File>Open. You will get a windows box. From the windows box, go to the drive you have your desired photo to edit. Click on the photo and click open. That will manually import the photo in Photoshop.

The simplest way of opening the photo in Photoshop is the automatic way. It will help you to open the image within seconds. To apply that, go to the drive you have the photo in and drag the photo in the Photoshop bar. That is how the photo will be opened automatically.
Taking the Path Layer
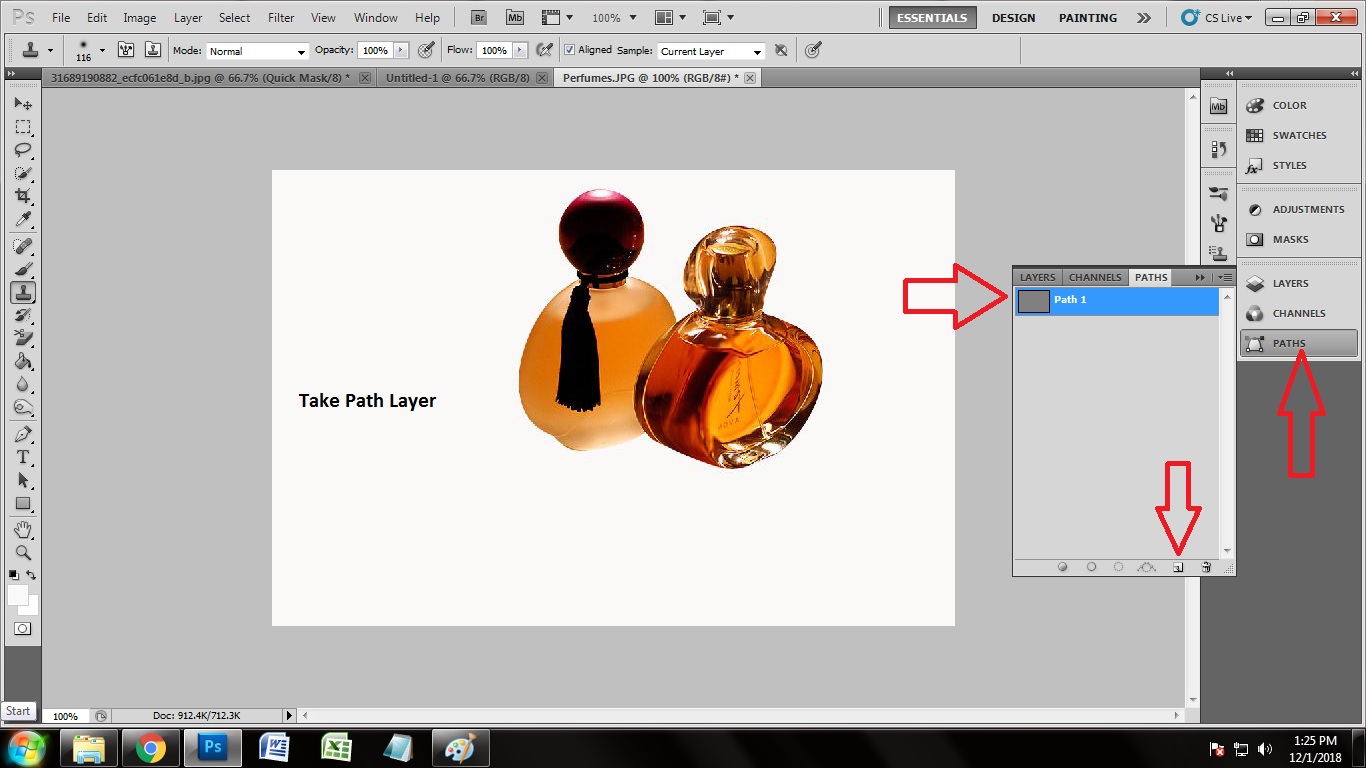
In Photoshop, the interesting part of working is working with different layers. In Photoshop, you can edit a single photo in many ways by taking different layers. To add mirror reflection to out photo, we need a paths layer with the background layer.
Taking the paths layer is important because we are going to do clipping path on the image we have. We cannot draw clipping path if we do not take the path layer. To take path layer, you have to go to the layer panel. Click on ‘Paths’, by which you will get a paths box. Click on the bottom of the path layer on the square icon to get the path box. Now you can start working.
Create Clipping Path
In every photo editing thing, clipping path plays an important role. You may have a question ‘what clipping path is?’ Well, clipping path is a photo editing technique which makes the shape of your main object constant and so you can play with the background. By drawing clipping path, you can select the whole object of the photo.
So the next up we are going to do is drawing the clipping path over the perfume image we have. To draw the clipping path, there are several tools which you can use. Use of eraser tool, pen tool, marquee tool, magic wand tool, lasso tool etc. are eligible for drawing clipping path. Here, we have selected the pen tool to draw clipping path. Press ‘p’ on the keyboard to select the pen tool. After activating the pen tool you will get a pen icon on the screen. We are going to draw the clipping path by the help of that pen icon.
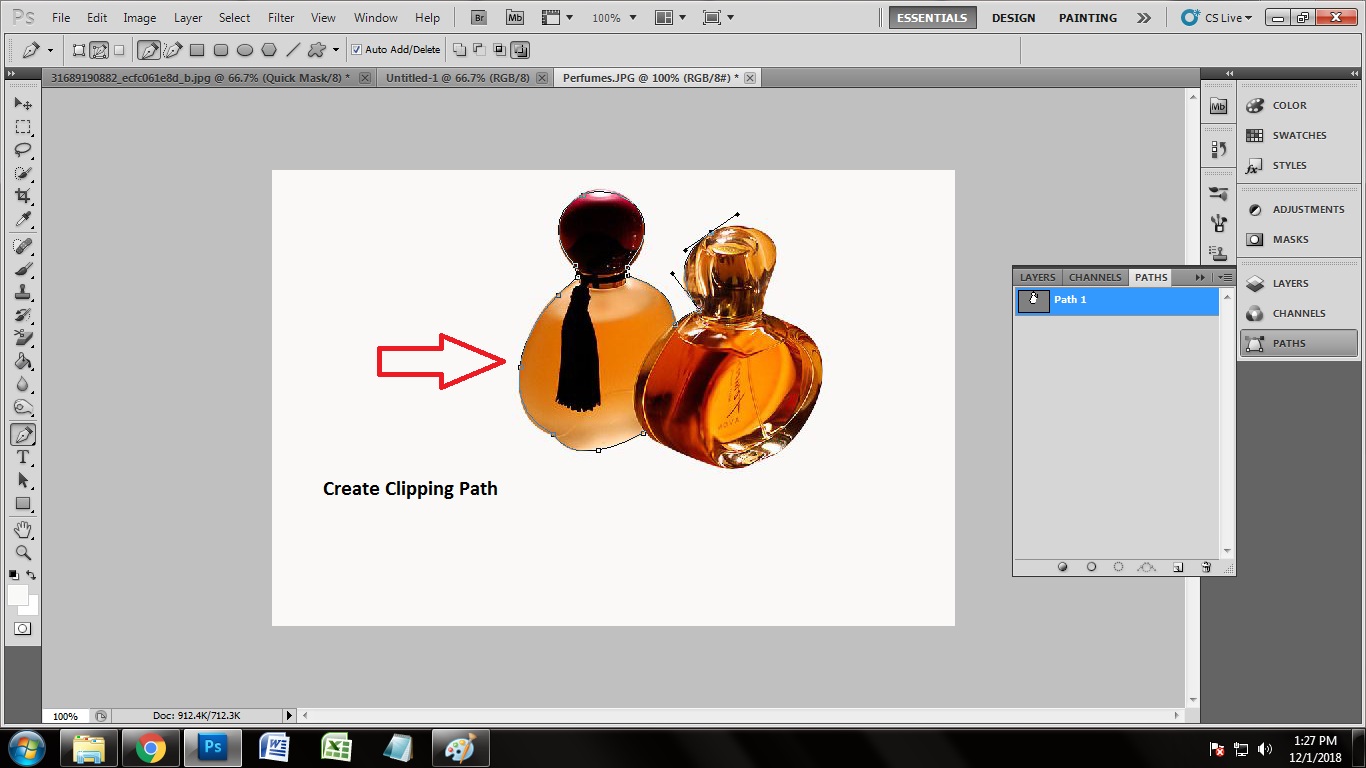
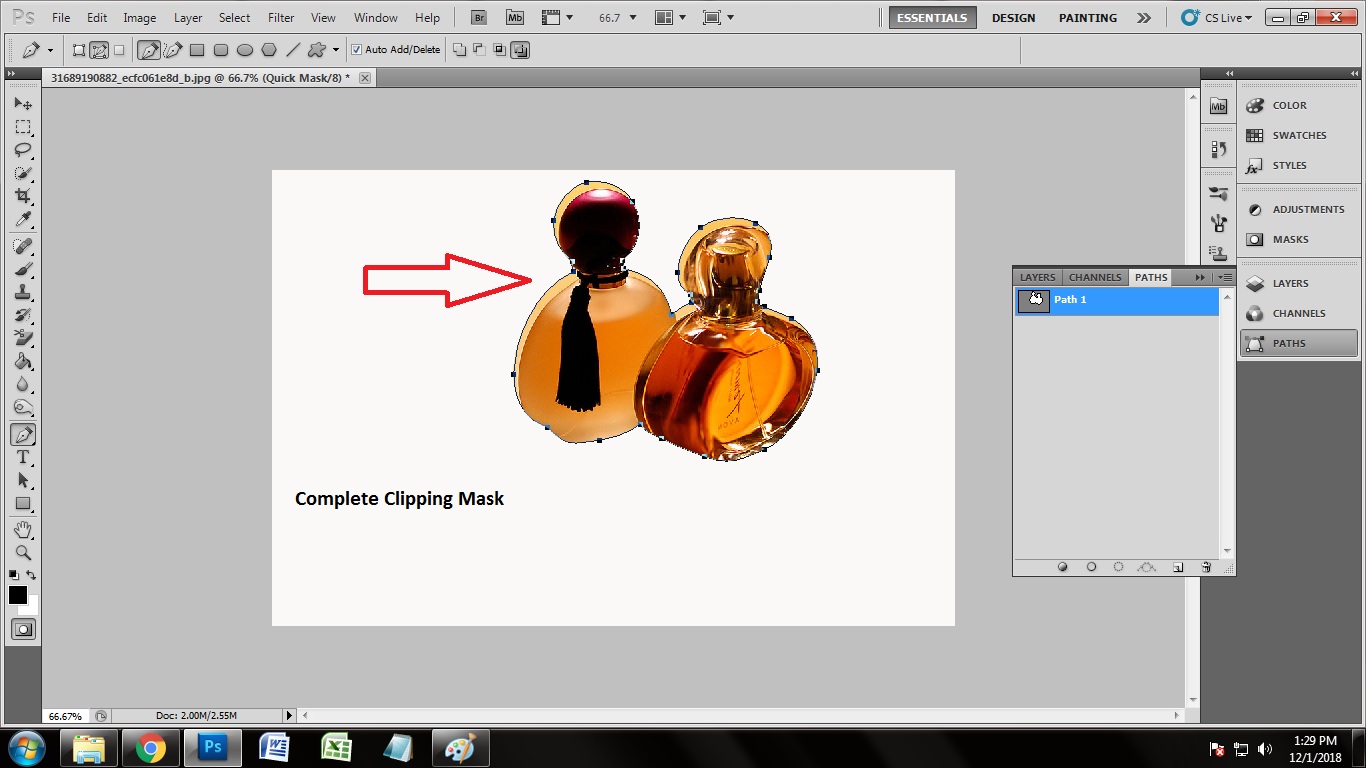
Since there are not too many curves and loops, drawing the clipping path over this perfume image was easy. We have just put the anchor points on the correct positions where the pointers were needed. You have to focus on the details. Putting the anchor points in wrong places may cause of losing some details. So put the anchor points very carefully. Close the anchor points from where you started. Drawing the clipping path will be completed right after closing the anchor points.
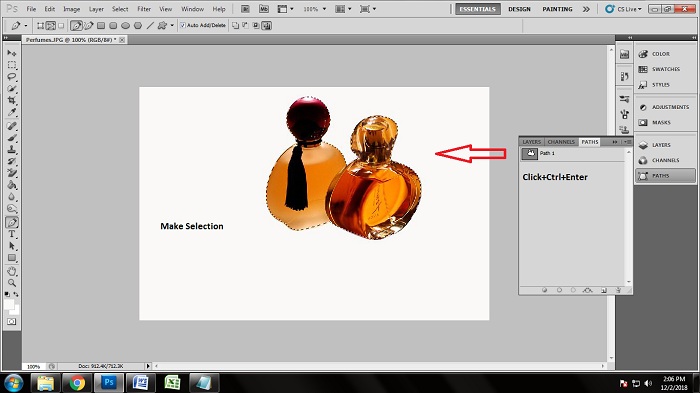
Select Path Area
Drawing the clipping path is the tough thing. Almost every photo editing company is famous for providing clipping path services. Anyway, let’s proceed to our next step which is selecting the clipping path. We need to select the clipping mask which we have already created. This step is really easy and simple to perform. To make the selection, click on the ‘path layer’. Clicking on that, press ‘ctrl+enter’. Doing that, you will see many dots are moving around the subject we have created clipping path. That thing indicates that the clipping path areas have been selected. Now, we can proceed further.
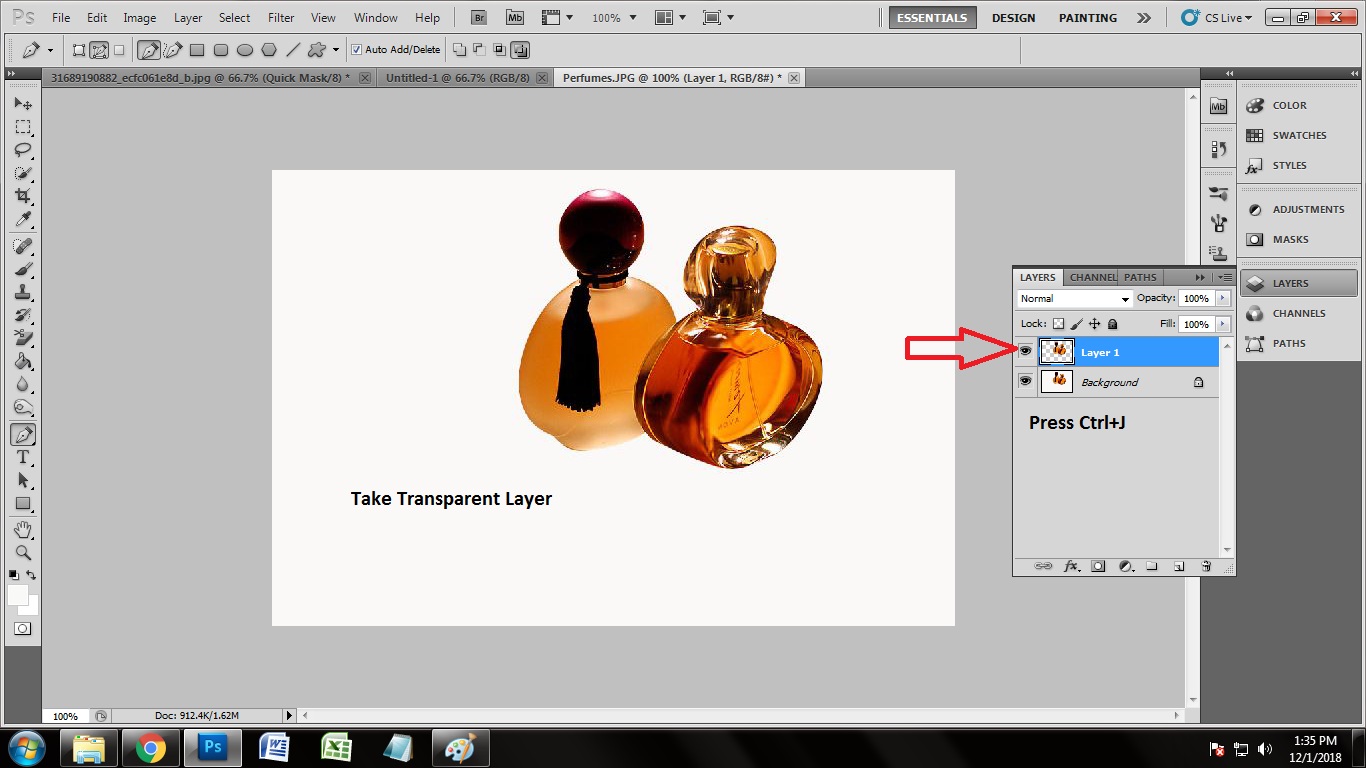
Take Transparent Layer
We can remove the background in Photoshop in the same layer after selecting the path area. But we have to take another layer to edit the photos in other ways. Here we need to take the transparent layer and have to move the selected masked area to the transparent layer. As we have already selected the masked areas, move the masked image in the transparent layer. But how are you going to do it. This is the matter of only a few seconds.
Keep the masked area selected. Go to the background layer and press ‘Ctrl+J’ where another layer will be created named transparent layer. It is call the transparent layer because the whole background will be transparent keeping the subject constant. As we can see that the whole background has become transparent but the perfume image is set perfectly there. Moving the image to the transparent layer, the image has actually been doubled.
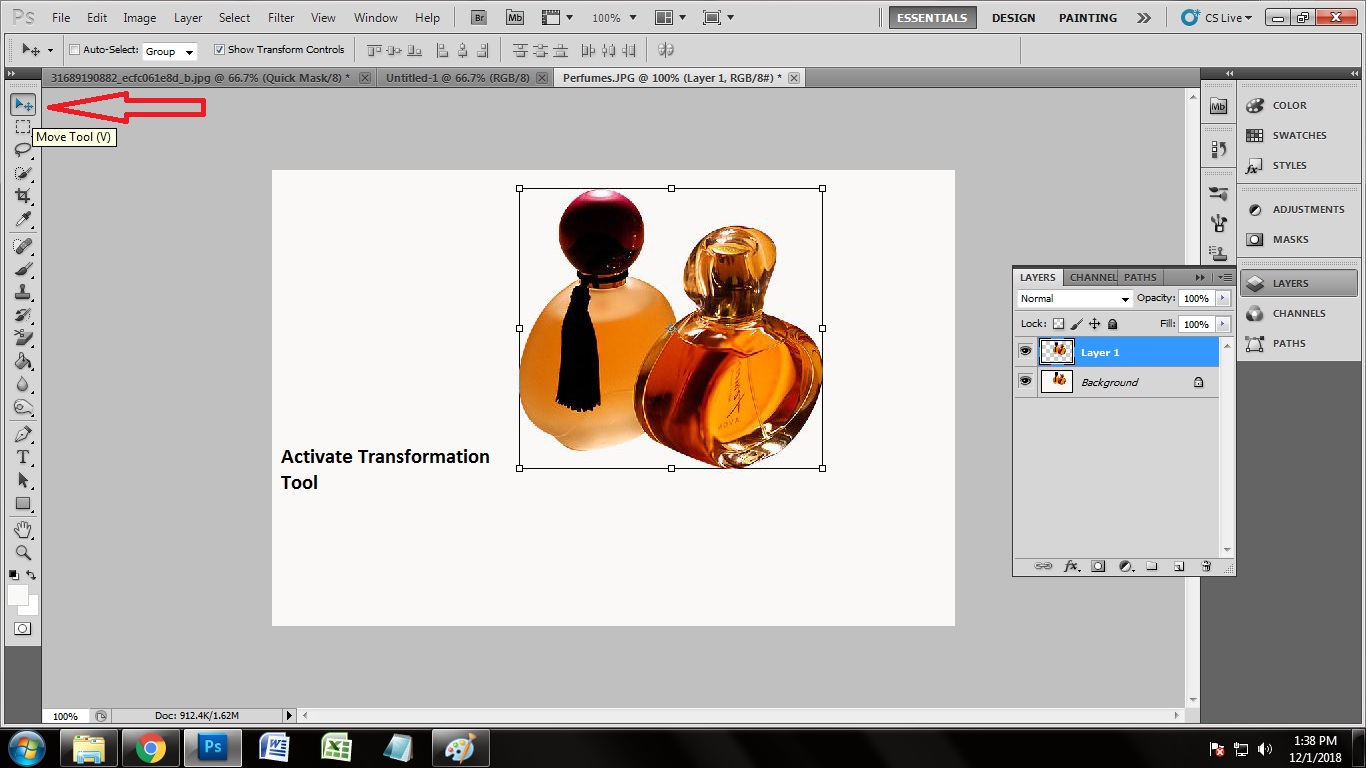
Activate Transformation Tool
When we take the image into transparent layer, the image become doubled which helps us to get another accurate image of the image we are working with. This is a magical Mirror effect technique using Photoshop. To get the doubled image, we have to activate the transformation tool to do that. Transformation tool is an amazing tool by which you can place the subject to any place you want to put in. Activate the transformation tool keeping the transparent layer activated. Go to the tool bar and see on the top right on the tool bar. You will get to see an arrow icon which indicates as the transformation tool. Clicking on that, the transformation tool will be activated.
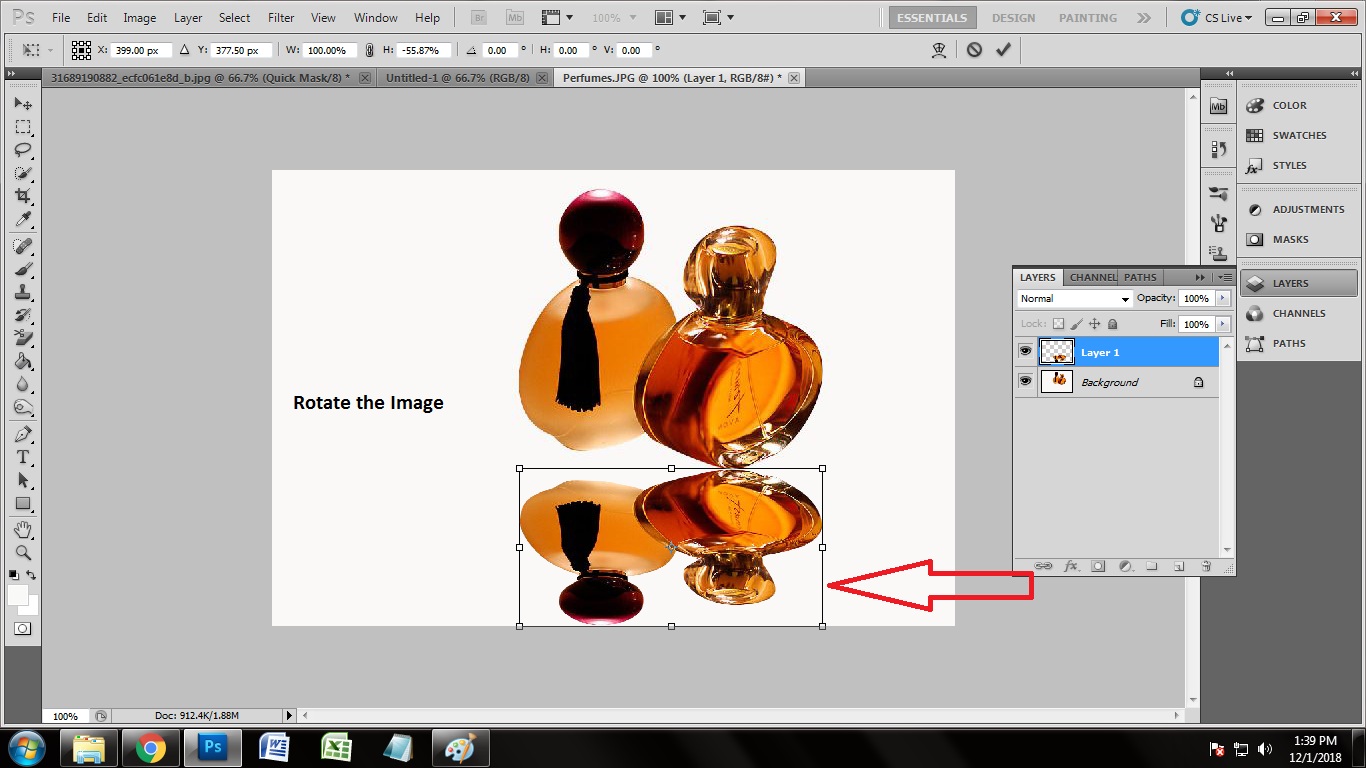
Make Rotation
When you will activate the transformation tool, you will get to see a box appeared surrounding the subject we have just got into the transparent layer. It is time to get the doubled image out. Stretch the points of the box and you will get the doubled image out. Stretch the image and bring it upside down to the main image so that it looks real. Since we are adding mirror reflection, you always have to keep one thing in mind that the mirror reflection remains upside down if the subject is standing straight. Make the rotation with the help of transformation tool and rotate the doubled image upside down.
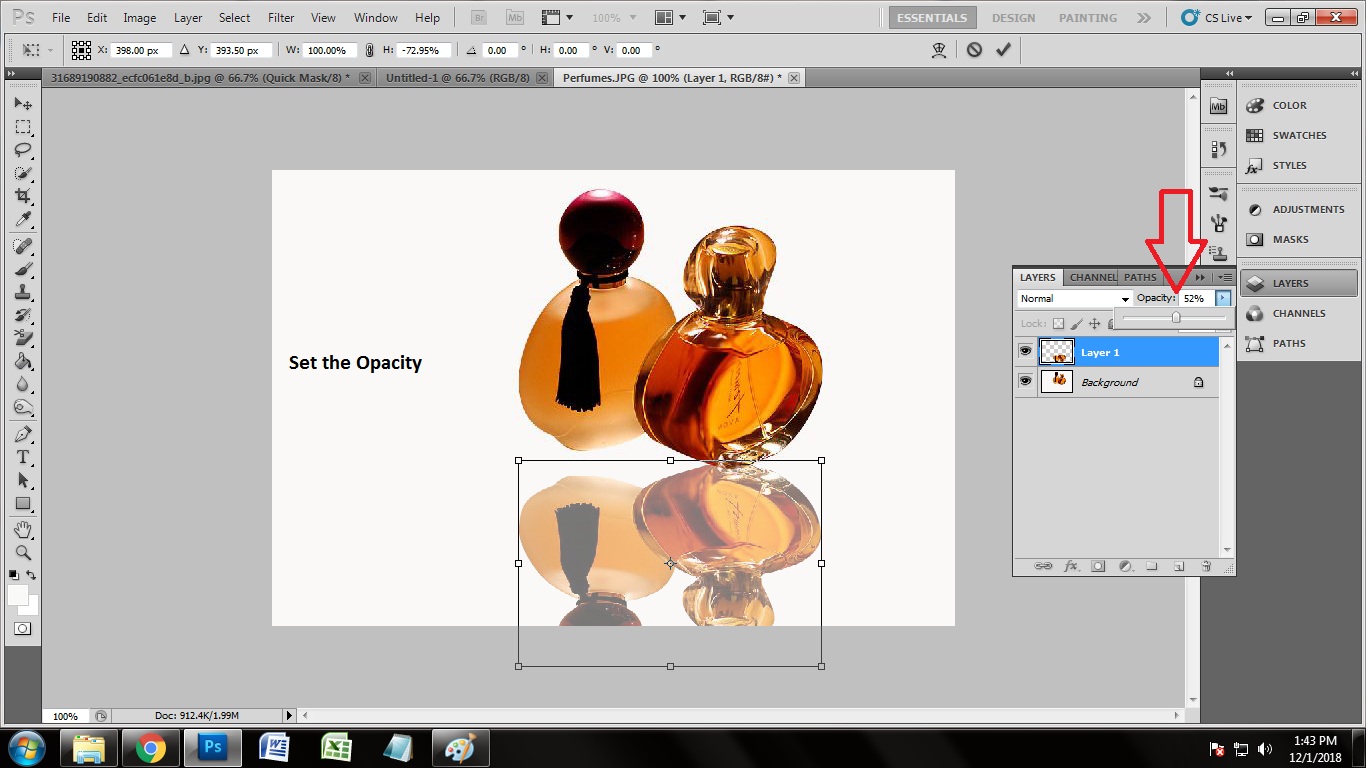
Set the Opacity
Now we have got the exact doubled image of the perfume image in the right position. But it does not look like mirror reflection, does that? It looks really unreal. We have to make the mirror reflection look real. It is the adjustment of opacity by which you can make the mirror effect look real on the photo. You will get to see the opacity box on the layer panel to the right. You will get to see the slider by which you can set the opacity perfectly. Here we have set the opacity to the 52% so that the mirror reflection looks natural and real.
Here’s the Photo after Adding Mirror Reflection:

Conclusion
Many professional image editing services like Clipping Path Experts are providing such exceptional kind of mirror reflection service to some famous Brands. These techniques were briefly described by one of such professional.
Mirror reflection technique is very easy as shown if practiced. The tough part is while clipping path over the product image. If you can practice clipping path then you can easily do the reflection part very easily and faster. New upgraded Photoshop like Photoshop CC 2019 is also a very much helpful tool for applying this technique. So don’t just wait start practicing now if you want to reach the top.