There are lots of genuine ways to manipulate an image and turn it into a complete different image. There are different sort of Photoshop tools for doing such things. You can use image manipulation for many purposes but mostly for fun and showing your creativity.
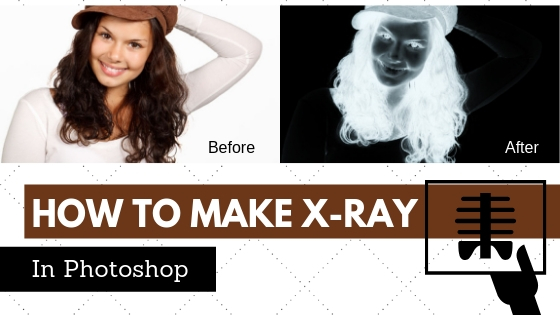
There is one great image manipulation technique known as X ray effect. It will help you turn any image into and x ray and you can actually show the inner bones of a human or animal using this technique.
In this article I’ll show you the steps for doing this sort of manipulation. So let me show you the actual way of How to make X ray photo in Photoshop. Let’s start!
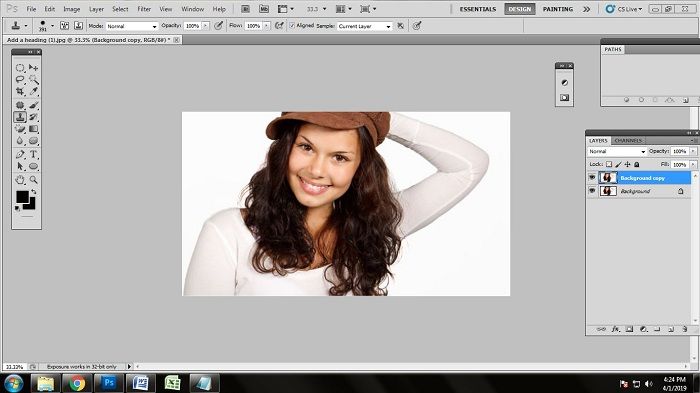
Open the Photo
To edit the photo anyway, we need to know which photo editing application is the best. And of course Adobe Photoshop is the best option for photo editing and currently the best application. So it is pretty obvious that we cannot do any kind of photo editing without opening the photo or importing the photo.
There are 2 ways of opening the photo in Photoshop. One is manual and other is automatic. To open the photo, you can go to File>Open, you will get a windows dialogue box. Go to the file location and click on the file. Press ok to open the photo. The photo will be opened in Photoshop.
You can also open the photo just by dragging the photo into Photoshop. Go to file location and drag the photo in Photoshop bar. Doing that, the photo will be opened in Photoshop within a second. I have opened the photo automatically by just dragging. It is time saving.

Duplicate Background Layer
The beauty of Photoshop is that we can work on different editing taking different layers. So the next thing we are going to do is to take a duplicate layer of the background or the background layer copy. To take the duplicate background layer, go to the layer panel. Looking down, you will get to see some icons. Click on the background layer and drag the background layer to the square icon next to the delete icon. Doing that, a duplicate background layer will be created automatically.
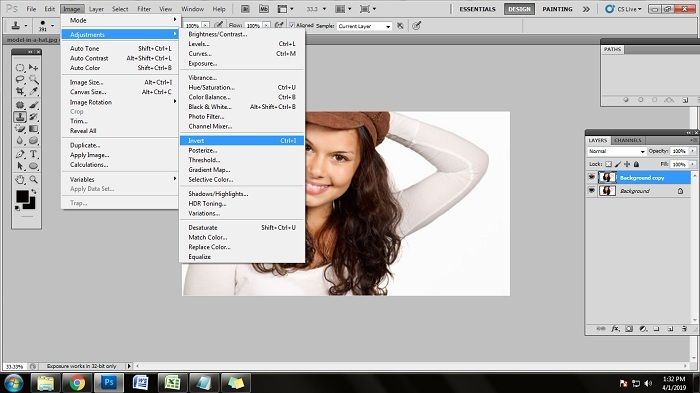
Select Invert
Making an x-ray of the photo is quite difficult and creative. Some photographer click the photo to make the photo looks creative photography as x-ray. What we have to do after making the duplicate layer is filling the invert effect on the photo. But you have to work on the duplicate layer.
To make the photo invert, go to Image > Adjustment > Inverts. Doing that, the entire photo will be inverted. You can also make the photo invert by pressing ctrl+I on keyboard. Pressing that, you will see that the photo has been inverted automatically.
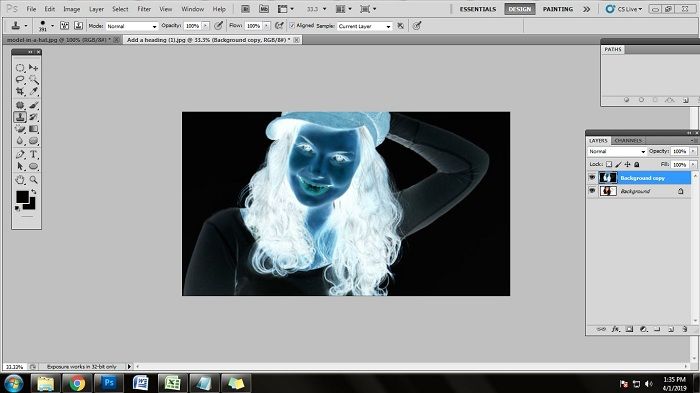
This is the photo after making invert
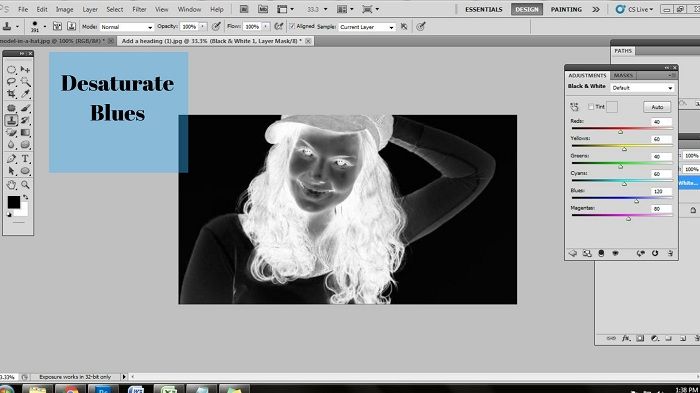
Desaturate Blues
As you can see the photo after inverting, got some blue effects more, it is not looking that good and the photo will not turn into x-ray perfectly if most of the blue remains. So we need to desaturate blues from the inverted photo.
To desaturate blues from the photo, click on adjustment layer. You will get a dialogue box including many options in the adjustment layer. Click on the black and white from the dialogue box. Doing that, you will get another box which will be having some color options and sliders. Click on the blue slider and adjust the radius into 120.
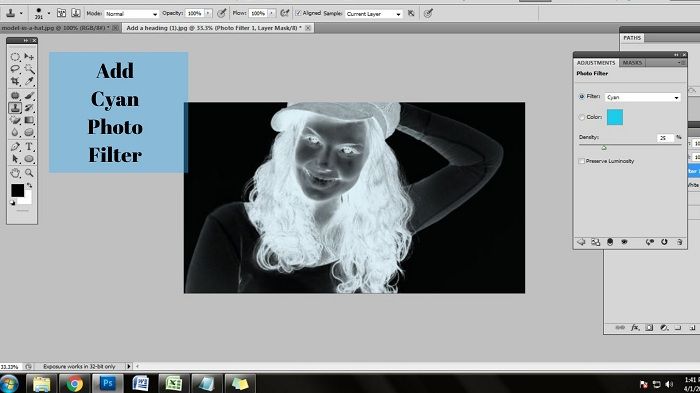
Add Cyan Photo Filter
Right after desaturating the inverted photo, we need to go for some filter effects. Now we are going to add cyan photo filter into the photo. To do that, go to the adjustment panel. Click on Adjustment > Photo Filter. That will get you another dialogue box. Click on the filters and select Cyan from various colors from the option. You need to decrease the density of the cyan filter effect. Use the slider and decrease the density to 25%.
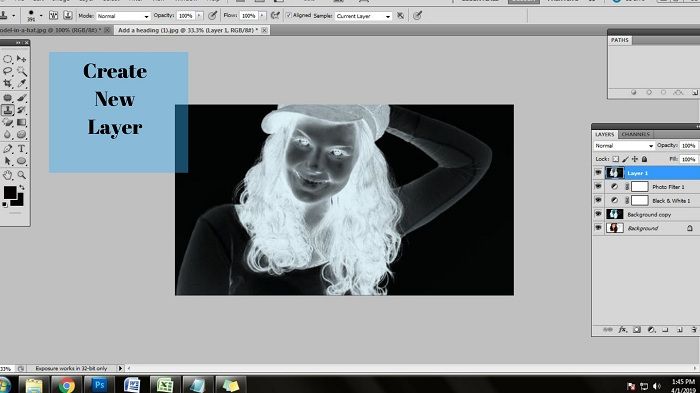
Create New Layer
After adding the Cyan photo filter to the previous layer you will see that the image looks a bit better bluish black and white colored. Then you will need to create a new layer making this color a bit better and glowing. This new layer will help you add other filters to the image to make it look like an original x-ray. To activate or create this new layer press Ctrl+Alt+Shift+e. This will create a new layer of the image in the layer box on the left.
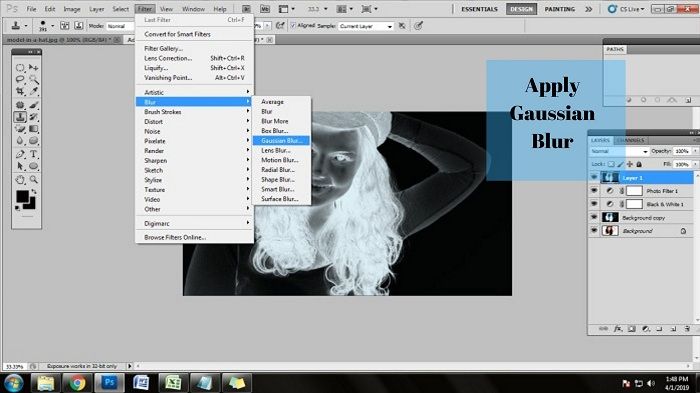
Apply Gaussian Blur
In the new layer, we created softness is needed. To make the image a bit softer we will apply a filter known as the Gaussian blur. A Gaussian blur helps to blur out the image evenly. It doesn’t leave any spots and makes the whole layer of the image smooth. To apply Gaussian blur to this new layer go to the Filter > Blur > Gaussian blur. Then adjust the quantity of the blur on the layer and hit OK.
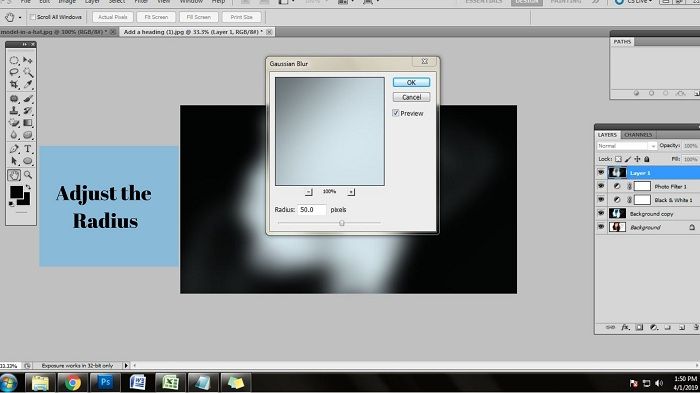
Adjust Radius
Now you will have to know how much the adjustment of the blur should be. For creating an X-ray image you will need to take a blur of at least 50 pixels. It will make the layer evenly blurred and then you can use other layers and adjustments to turn it into a completely accurate x-ray image.
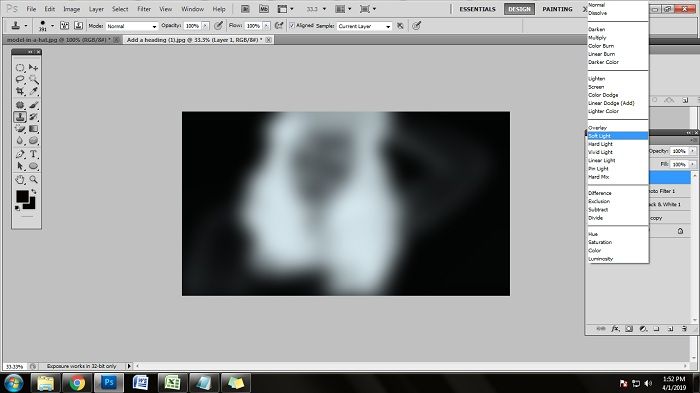
Change Layer Blending To Softlight
After using the Gaussian blur on the layer you will not be able the subject of the image. We will need to keep the subject visible while giving it an X-ray look. To change these effects simply change the blending mode of this layer. For this layer and effect change the blending mode from the top of the layer tab. Change the layer blending to Soft light. This way you will get a layer which is soft and the subject is visible.
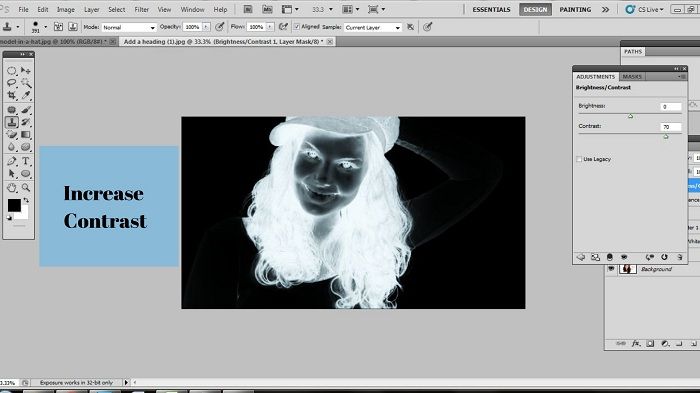
Increase in Contrast
Now we will need to fix the contrast of the image. This way the image will look original. The originality of the image will be secure after applying the brightness and contrast adjustment layer. To get this adjustment layer to go to the bottom of the layer tab and in the bottom of the tab, you will see a circle shaped icon. Click on the circle shaped icon to get the adjustment layers. Select the contrast layer and set the contrast to 70 and keep the brightness to 0. Then you will see that the image is close to an original x-ray image.
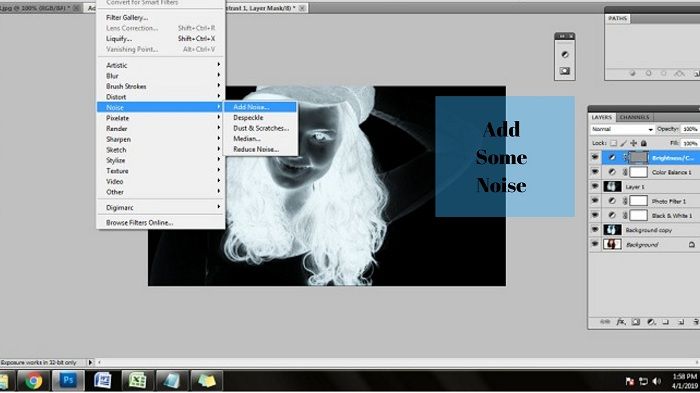
Add Noise
Noise will help this image to look like printed on an actual X-ray paper. So we will need to add a little bit of noise to the layer. So go to the Filter > Noise > Add Noise. Then use the slider to give it a proper noise.
Change Blending Mode
The noise may destruct the image completely. We will still have to make some small adjustments like changing its blending mode to make it look original. So go to the blending mode option of the layer and change it to soft light. This will make your image look real.
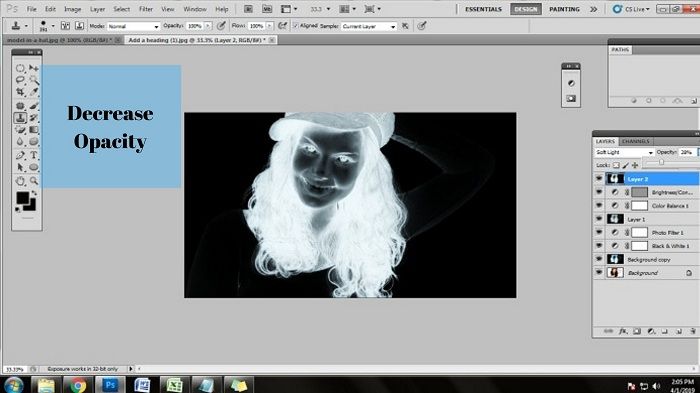
Reduce Opacity
After applying the above effects to the image you will notice that it is looking a bit hazy and extra noisy. We won’t need this much noise on the image. To make it look perfectly original decrease the opacity of the layer. Make the opacity favorable for you. Then save it as an image.
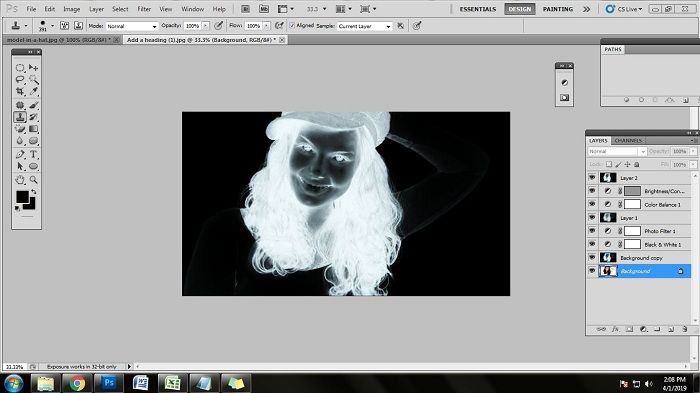
This is how the image will look after edit –
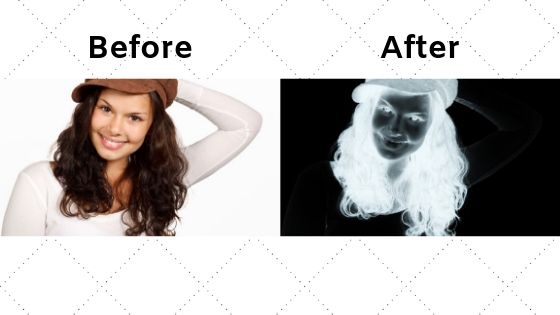
Before and After
Conclusion
X-ray effect is mainly used for fun as a Photoshop user. You can understand the different uses of Photoshop tools using the methods given above. These tips and ways will help you create an actual looking X-ray filter to the image you want to. Make Photoshop your companion to learn more about such amazing image manipulation techniques. You can also take help from photo editing companies who provide clipping path service too.