Till now you must have watched lots of Photoshop cs5 masking tutorial. Most of the tutorial you’ll see will tell you how to use layer mask to mask out background from objects as hair, fur, glass, etc. You know that there are some techniques that can be used to place an object from the whole image on any kind of shape or text easily with just one click?
I guess not until now. Yes in this Photoshop masking tutorial I’ll show you the easiest way to mask an object into any sort of shape with just a click. This type of masking is known as the clipping mask technique.
So without further adieu, let’s start!
Transparent clipping mask Photoshop technique
Open the Photo
To do a clipping mask, you need to open the photo in Photoshop at the first place. You can open the photo automatically or manually as well. This is the method to open the photo manually, open Photoshop application and go to File>Open. You will get a dialogue box of windows. Go to the drive where you have your required photo. Click on the photo and press enter. Your photo will be opened in Photoshop by doing that.
There is another easy way of importing the photo in Photoshop. You just need to have your Photoshop opened. Go to the drive where your required photo is located. Click on the photo and drag that to Photoshop bar. The photo will be opened in a fraction of second.
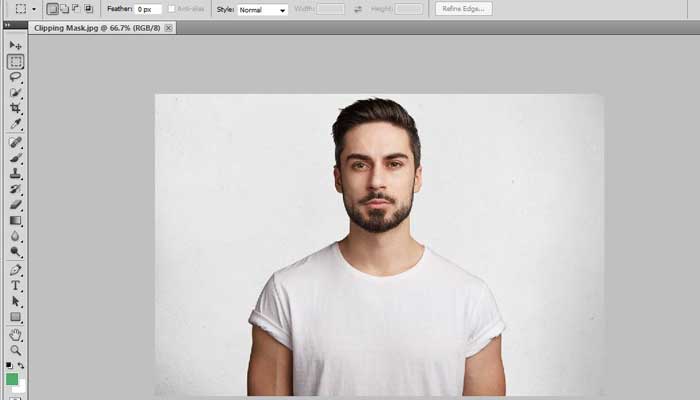
Choose Required Tool
As you can see that the photo has been opened in Photoshop, the next thing you need to do is selecting the tool you required. Here we need an oval shaped tool. To choose that, go to the tool bar in the left and click on the circle sign. You will get to see some other shapes. Click on the oval shape tool from there.

Draw with the Shape
As we have got the oval shape which we wanted, we need to draw on the photo with that oval shape. Click on the photo and stretch it as per your requirement. It would be better if you place it in the middle of the photo. That is what we did in this photo. Doing that you will get the unwanted backgrounds removed and only the shaped photo would be there.
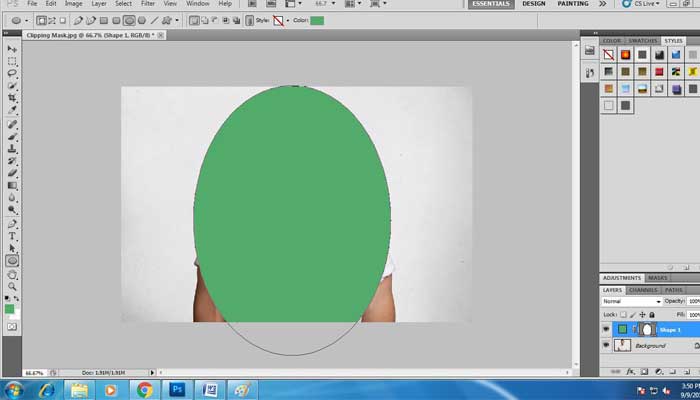
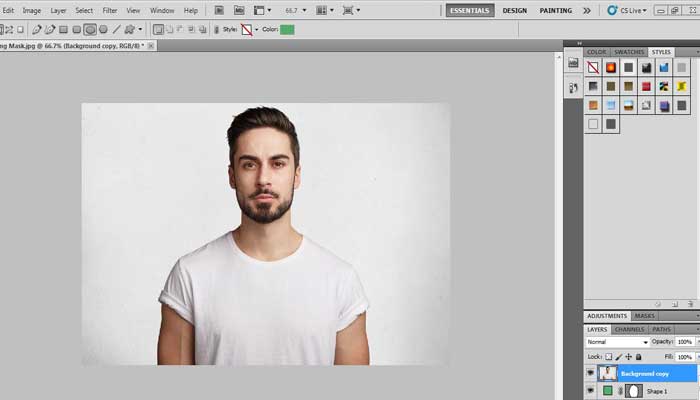
Create Copy of Background Layer
After creating the shape over the photo, the next thing which is to be done is make a copy of background layer. Click on the background layer and drag it down to the square shaped icon. Doing that, a copy of background layer will be created.
Shift the Copy Background Layer
The layers play important role in Photoshop while doing different types of works. It is layers using which we can make our works easier. So we need to shift the background layer to the top. As the background layer is in the middle, drag the copy of background layer and place that on the top.
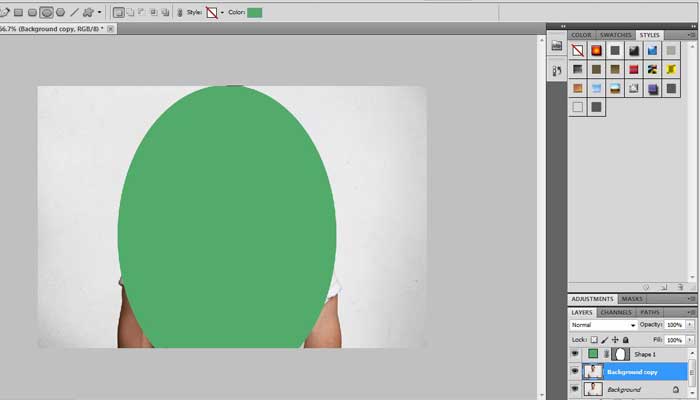
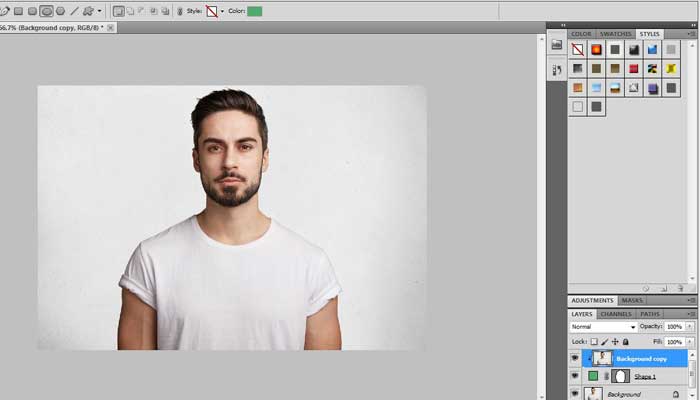
Create Clipping Mask
Now it is time for making the clipping mask happen. Click on the shape and press alter button on the middle of the background layer copy and shape 1. You will get a sign which will indicate that it is placed successfully. Leave the cursor there and isolate the original background layer by clicking on the eye sign. You will see that the background has been removed and only the oval shape of the photo is there successfully.
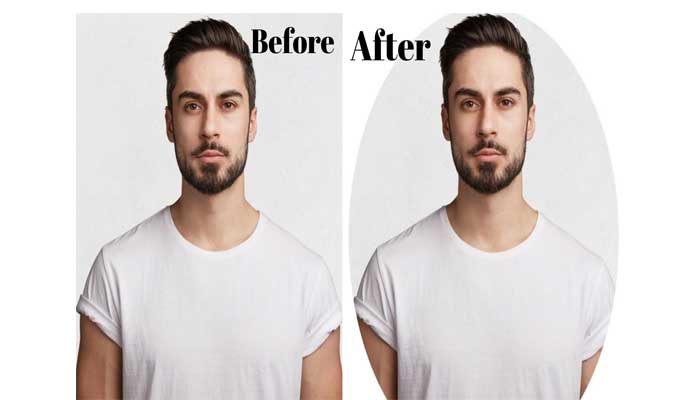
Here is how it will look after clipping mask on shape –
Clipping mask Photoshop text technique
Open the image
This is something you already know about. The most basic step is obviously to open the photo in Photoshop. There are two ways but the easiest one is to simply drag the photo from your drive and drop it on the canvas of Photoshop. You can also press ‘Ctrl + O’ To open the photo from the pop up box of your PC drives that will appear on the screen.
![]()
Duplicate the background layer
Duplicating the background layer while doing any sort of photo editing is very much necessary as it saves the actual image from getting harmed. This is why duplicate the background layer and work with the copy layer of the background. To duplicate it just simply right click on the background layer and choose the duplicate layer option from the menu. Then click yes on the dialog box that will appear. Hence your background layer will get copied.
![]()
Select the Text tool
As we will do clipping mask of the image on the shape of the text we will need to write a text for it. To write a text on Photoshop we’ll need a text tool. You can find the text tool on the tool bar on the left side of Photoshop. You can also click on the ‘T’ button on your keyboard to access the Text tool easily.
![]()
Write a Text
If you really want to use clipping mask on a text then you will have to write a text first. To write a text click on any area of the canvas of the image and write any text you want. After you write a text you’ll see that this text has become a new layer on the layer tab.
![]()
Drag text layer below the background copy layer
Sometimes the Text layer gets on top of the main image (background copy layer). The rule of clipping mask is to keep the text layer on bottom of the main image and then to use the clipping mask technique. To fix this issue hold the text layer with your mouse and drag it below the background copy layer. Then you can use the clipping mask method.
![]()
Create clipping mask
Now after all these steps here is the one click method of doing clipping mask on text. To apply the clipping mask effect right click on the background copy layer and choose the clipping mask option from the menu. Then your image will automatically get placed to the text layer. Thus, your clipping mask will be complete.
![]()
Here is how the image will look after clipping mask on text –
![]()
Conclusion
I hope that these tips will be very helpful to you while doing clipping mask on your images. You can do it using the Photoshop versions starting from CS5 to the latest one. Therefore enjoy and keep learning new things. Life itself is a school.