Close up product photography of detailed objects requires good lighting. However, being able to light a piece properly to show the true color, details and beauty of an object can be difficult. A light box is a great solution. It provides light diffusion and a uniform background against which to place the object. Although a product photography light box can be expensive, this article shows you how to create one for as little as $2 or nothing, if you already have the materials.
Steps To Make Cost effective Light Box
These tips are one way of making a good photography light box. I hope that you will be able to use this tutorial as a starting point and gain the confidence to make photographs with your own making light box.
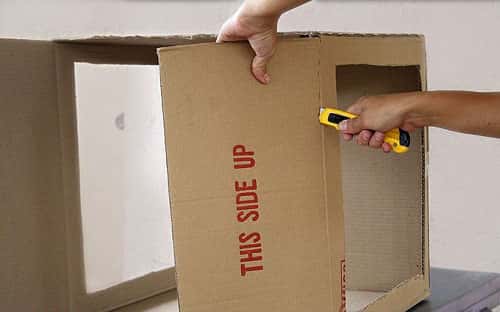
1. Choose a Box and Cut it
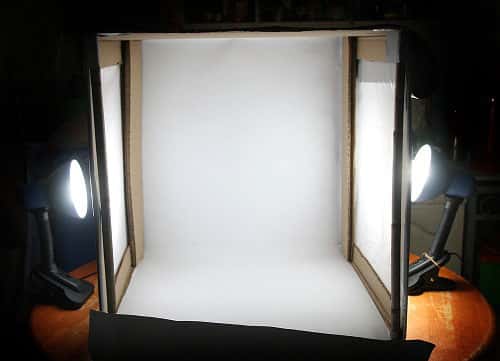
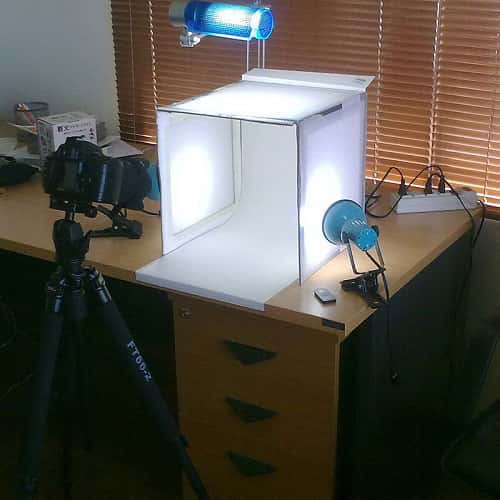
First select a box that is the right size for what you want to photograph. For small items like jewelry a box about 30cm wide or 1 foot is good, although if you want to photograph larger items you will need a larger box. Cut out the top of the box and the front, leaving a bar across the top to help your box keep its shape.
2. Cover with White Paper
Line your box with white paper, making a curve with paper in the back horizontal corner so that it won’t show up in your background. Make sure you put white paper on the sides too; this will help to bounce the light around even more and make your photographs really bright.

3. Light Source
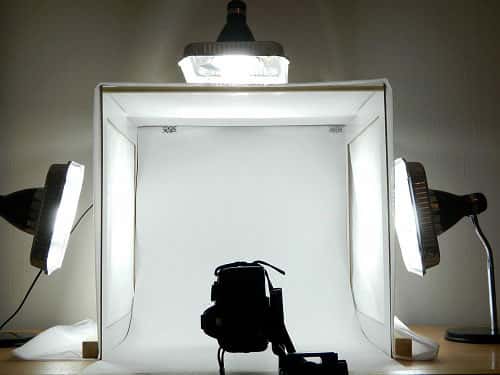
Your light source should be two adjustable lamps with daylight bulbs; 100W lights will get a great result. Daylight light bulbs are best because the colors in your photographs will be more accurate than if you use a regular yellowish bulb.
4. Light Setup
Arrange your light both sides of your box. Some people prefer to just use one lamp, but I find using 2 will eliminate all shadows and shows up the details on your work much better.
5. Camera Setup
If you have a tripod for your camera then set it up in front of your photography light box, if you don’t have any for now you can stand your camera on something to balance it.
Finally your light box is ready. Put your items in your box m, switch your lamps, arrange your camera and take some photographs.