In this digital world, everything has become digitalized. With this digitalization, the busyness of people is also increasing. Photography and photos are in high demand in this recent time. In photography, it is not only the subject which makes the photos look interesting, but also the background can make the photos look interesting as well.
There are many photos which may not look that good. There might be some fault in photography or something. Photo Editing is the best way of changing the photography. In some photos you may not like the background. Photo editing Background Removal helps you to change or replace the background. There are different Photo Editing Companies growing in the market for providing different types of photo editing services to the companies or individuals who want their photos to look good. In fact you can teach yourself how to change photo background using Photoshop.
Opening the First Image
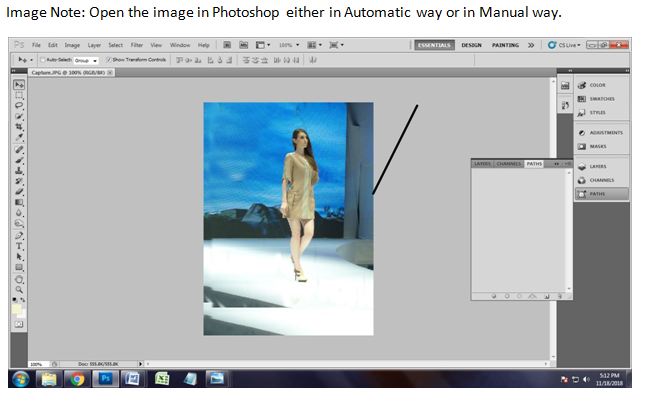
The first step of changing background in Photoshop is opening the image in Photoshop you want to work with. Since we will replace the background, we are going to open the first image in Photoshop CS5. Opening the image in Photoshop is probably the simplest thing to do.
There are 2 options of opening the photo in Photoshop. One is manual and the other is automated. In the manual process, you have to go to File>Open. You will get a dialogue box of windows from where you have to choose your required file. One you have got your file, click on the file and press enter. The photo will appear in Photoshop. The simplest way is the automatic way. In this process, you just have to go to your drive where the file is located. Just drag the file in the Photoshop. The image will appear automatically. For you all we have opened the photo in the manual process. Have a look on the photo.
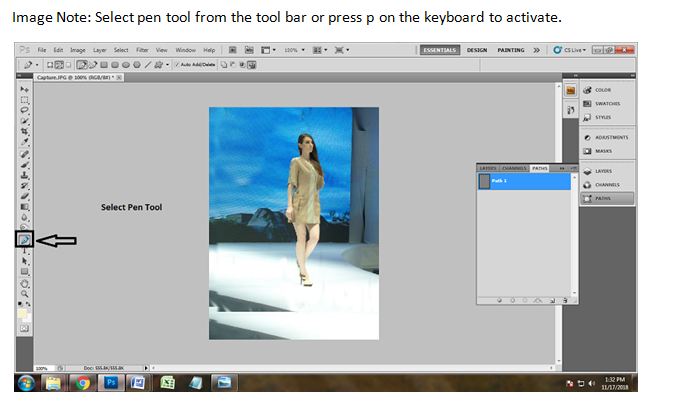
Activate Pen Tool
To change or to replace the background in Photoshop, we must need the help of clipping path or background removal. We need a tool to draw the clipping path. There are plenty of tools by which we can draw clipping path over the subject. Pen tool, magic wand tool, lasso tool, marquee tool etc. Bur we are going to choose the pen tool for drawing clipping path. The pen tool is more flexible to draw clipping path in every way. Activate the pen tool by just pressing ‘p’ on keyboard or click on the pen icon on the tool bar. You will see that a pen icon will appear on the screen.
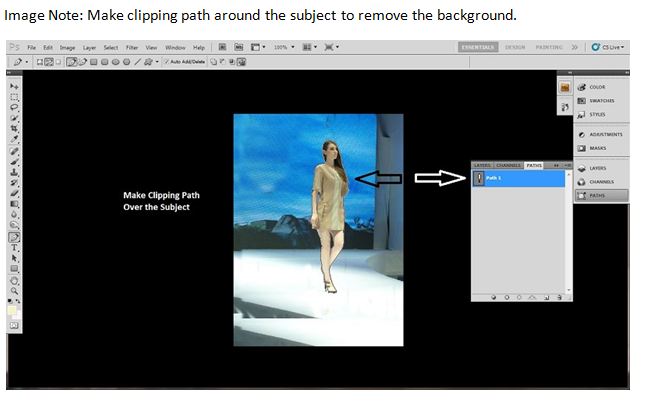
Drawing the Clipping Path
The most important thing to remove the background is, you should know how to draw a clipping path in a right way over the subject you have. If you cannot draw the lines of clipping path accurately, the unwanted parts of the photo will also come along. You can always outsource clipping path service from us for better paths.
So we have drawn the clipping path positioning the anchors where needed. You have to be much focused while drawing the clipping path. Not a single space of the subject should be left and excessive parts also cannot be taken.
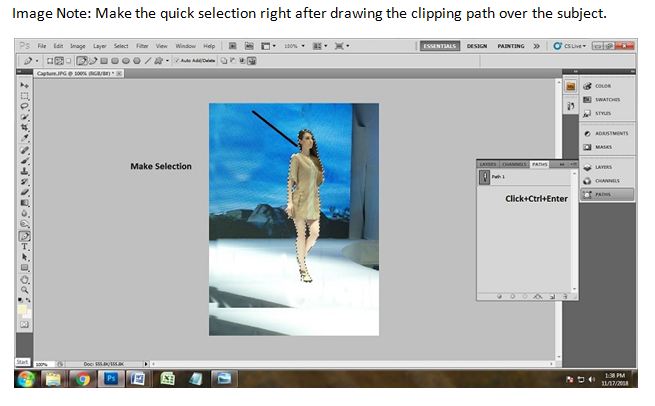
Making the Selection
To see if the background is actually removed or not, you have to make the selection of the path we have drawn over the subject. Without making the selection, you cannot change the background using Photoshop. To make the selection, click on ‘path 1’ where we have done clipping path and press ‘ctrl+enter’ on keyboard. Doing that, you will get to see many dots which are moving like ants around your subject, then you will get that the subject has been selected. That is also called quick selection.
Copy the Selection Mask
The next thing we have to do is copying the clipping mask we have just selected. We are going to copy the selection mask because we are supposed to replace the background using Photoshop. To copy the selection mask we will go to Edit>Copy. Click on the copy from the edit dialogue box and the entire path area will be copied and ready to be placed to other backgrounds.

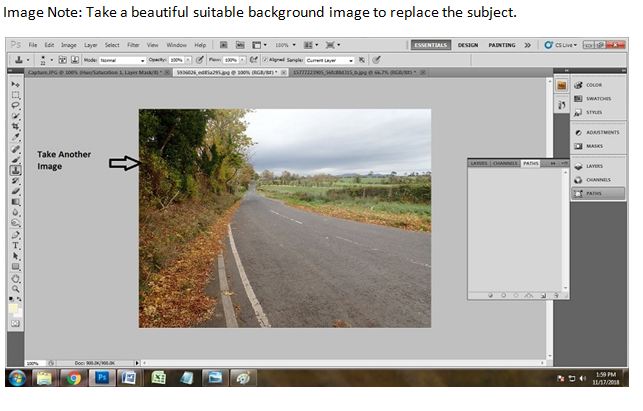
Importing another Image
Now we have to take another image which has a good and suitable background to place our main subject. Import the new background image as the same way we did it while opening our first image. Go to File>Open and open the photo or drag the photo in Photoshop. But do not close down the previous image. You may need that later on. We have dragged to photo this time and the photo has been opened. Here we have taken a photo which is having a road and no other objects.
This is the Photo of our New Background Image
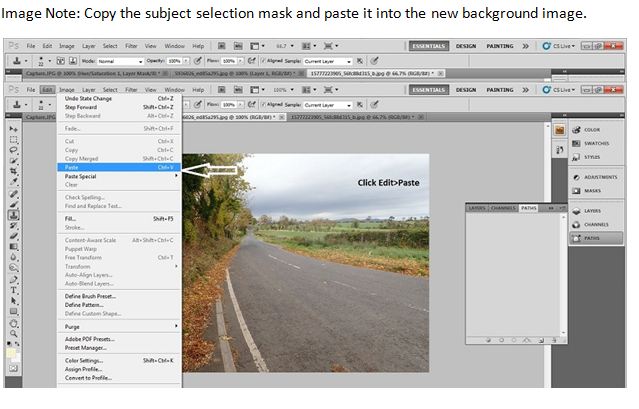
Replace the Subject to New Background
Now the time has come when you will see how to change or replace background in Photoshop in lesser time. Since we have copied the selected quick mask of the subject, we are simply going to paste it to the other background image we have taken. Go to Edit>Paste to replace the background in Photoshop. Click on paste and the subject will appear in the new background. You can even paste by pressing two buttons of keyboard. Press ‘ctrl+v’ to replace the selected part of the image.
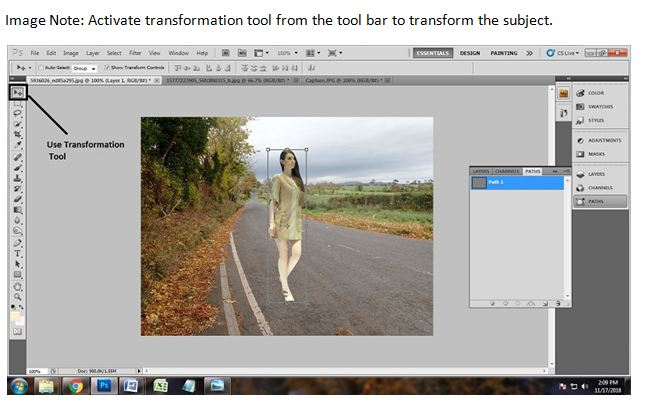
Select Transformation Tool
As we have just shifted our subject to another background, the subject is not placed as we required. So we need to give the subject a right place so that the picture looks good. Transformation tool is there to help us. Now we will activate the transformation tool of Photoshop. We have to activate the transformation tool from Photoshop tool bar. There are many tools in Photoshop. You will get the transformation tool on the top of the tool bar. The first tool from the top is the transformation tool.
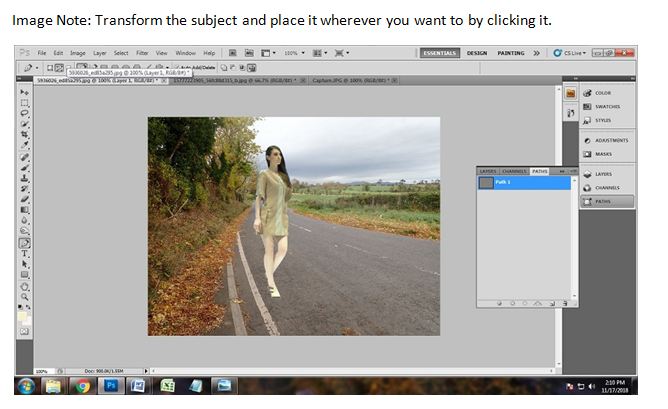
Transform the Subject
With transformation tool, you can place the subject to anywhere you want to. You have got a box over the subject. Click it up and place in your required place of the new background image. So we have taken the subject to the right side of the background. With transformation tool you can even rotate and give sizes to your subject. Press enter after you place the subject at the right place.
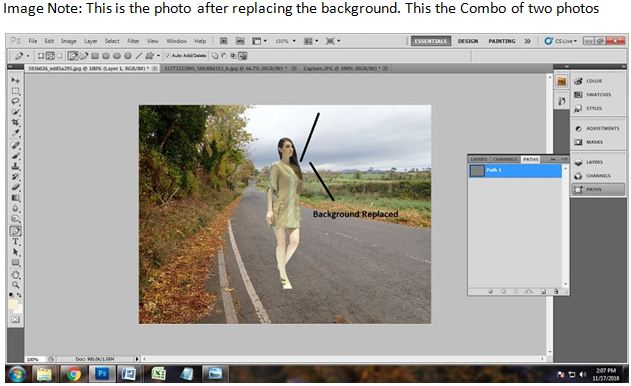
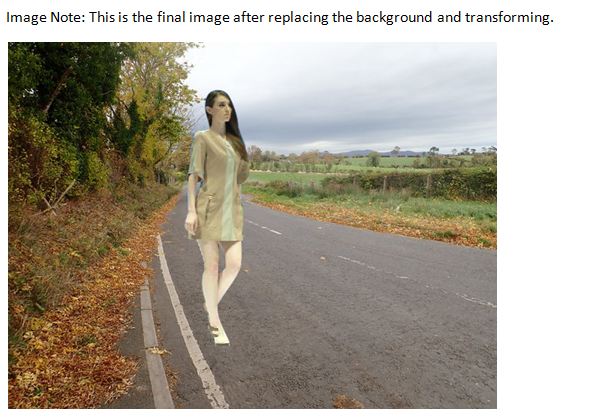
Here’s the Image after Transforming
Conclusion
In Photoshop, you can apply every photo editing technique. Techniques like masking hair, retouching faces, color correction, ghost mannequin and many more you can do with Photoshop. This tutorial is basically made for the beginners who really want to know how a background be replaced with another. I hope you enjoyed this tutorial and I hope it proves useful to people.