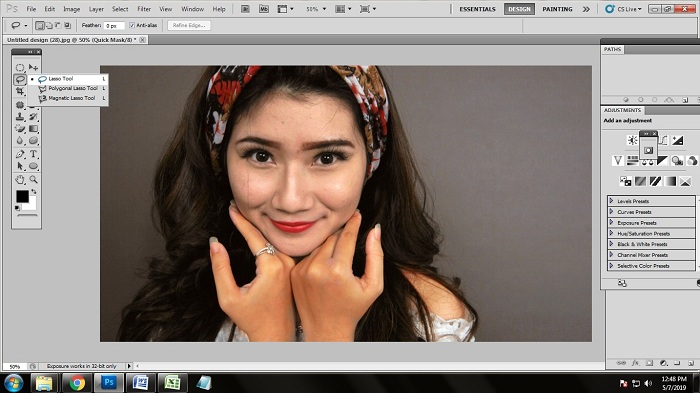
When you are working with a human image, it is very important for an image to show the perfect look. In every kind of industry such as fashion industry, production houses, telecommunication industry, print media, e-commerce companies and many other industries work with human photos in order to boost the conversion rate and to sell the products. However, may photographers face the problems in photographs where the model’s face and skin color is different. That is actually a great problem in a fashion photo. If a model photo does not have same face and skin color, the photo looks awkward. Hence, the conversion rate goes down. It is not possible matching the skin tone by photography only. Even the best camera setting will not be able to do that.
Photo editing is the best blessing for making the photos look fabulous. There are different photo editing techniques such as photo retouching, color correction, background removal, clipping path services, photo manipulation etc. which help you to get the photos edited and make them looking amazing. We are going to show you step-by-step processes of how to match skin in Photoshop.
Here is the first technique of Matching Skin color in Photoshop
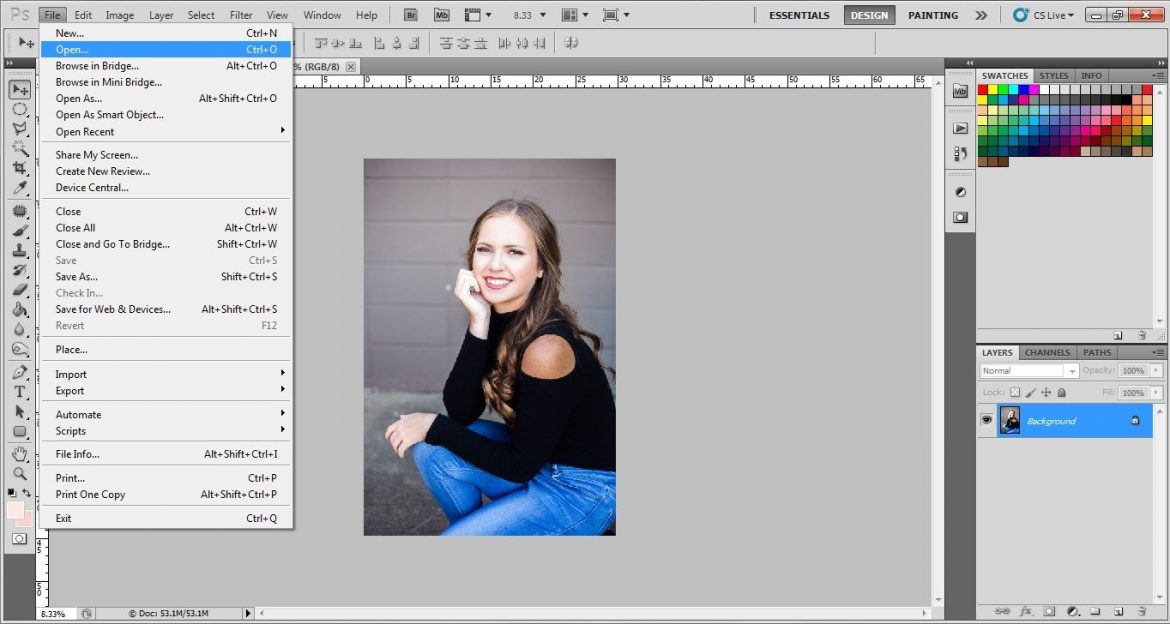
Open the Photo
As we have just talked about the best programming to expel foundation from photograph which is Photoshop, we are getting down to business utilizing Photoshop to expel the white foundation from human picture. At first, we have to open the Photoshop application. So open Photoshop on your windows/Mac. Presently, we have to open the ideal photograph to evacuate foundation in Photoshop.
You can open the photograph in manual manner or in programmed way. Both are straightforward and efficient. To open the photograph in manual manner, go to File>Open, doing that you will get a case of windows from where you have to go to your required record area. Snap on your required record and press enter.
The most effortless method for bringing in a picture in Photoshop is programmed way. You simply need to go to the document area, click on the required photograph and drag the photograph into Photoshop. The photograph will be on the Photoshop screen doing as such.
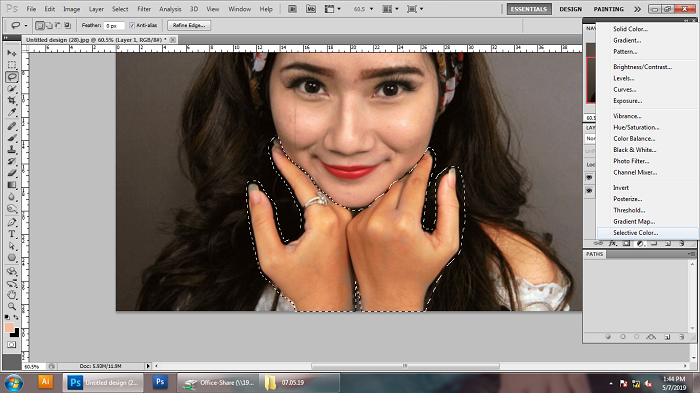
Activate Lasso Tool
As we want to match the skin color, we are going to use path method at first. There are different tools by which you can draw clipping path. But here we are going to choose the Lasso tool. To activate the lasso tool, press ‘l’ on the keyboard or click on the lasso icon from the tool bar. Doing that, the lasso tool will be activated.
Make the Selection
Here, you can see that the skin color is different from the face color. We are going to change the skin color and match it with the face color. From the lasso tool we are going to draw path over the skin which are visible in the photo. We have drawn the path over the hand skins and shoulder. The areas will be selected automatically after drawing the path.

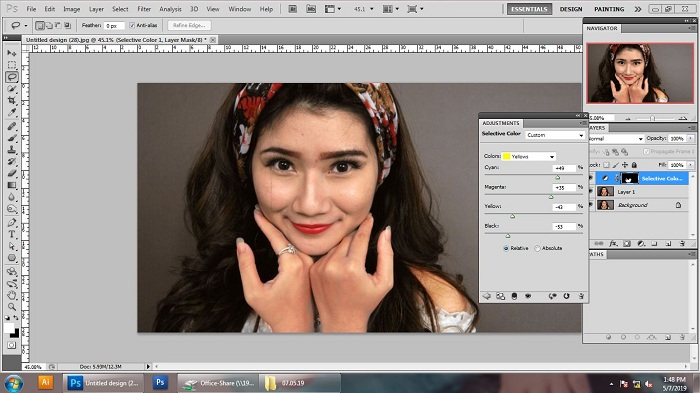
Select Selective Color
After the clipping path technique, we are going to apply one of the color correction techniques to get the skin matched. To do that, we need the help of selective color. Go to the adjustment layer box. Click on the adjustment layer icon. You will get a dialogue box. You will get to see an option named selective color in the bottom of the box. Click on that and you will get another dialogue box containing various colors.
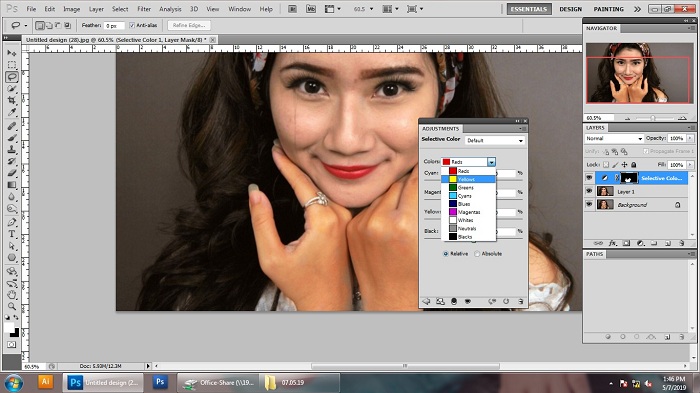
Adjust the color and Radiance
After getting the selective color dialogue box, you need to select the color which goes with the skin. We have selected yellow as the color as it goes with the skin color. Use the sliders of every color and increase and decrease the amount as long as you do not get the perfect skin color. Press enter and save the photo after you the color matched.
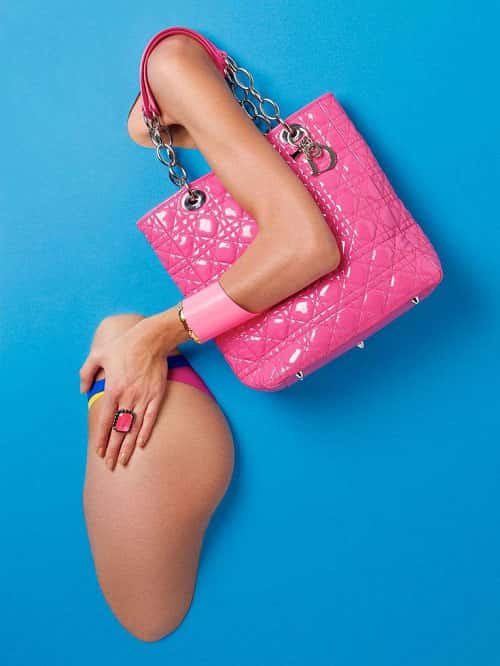
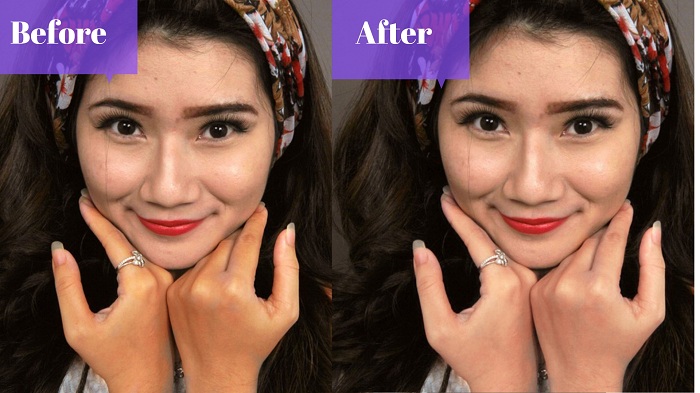
Before vs after
This is the before and after image of skin tone matching process
Here is another way of matching skin tone in Photoshop
Open Image in Photoshop
First step first, which is to open the image to be edited on Photoshop. You can use Ctrl+O to open an image in Photoshop. You can also drag and drop an image in the canvas of Photoshop.
Create a New Layer
A layer is needed to remove the blemishes from the skin of the subject in this image. Every photo editing company use different layers. To take new layers simply go to the layer bar and you can see a page like icon at the bottom of the bar. Click on the page icon and you will have a new Layer.

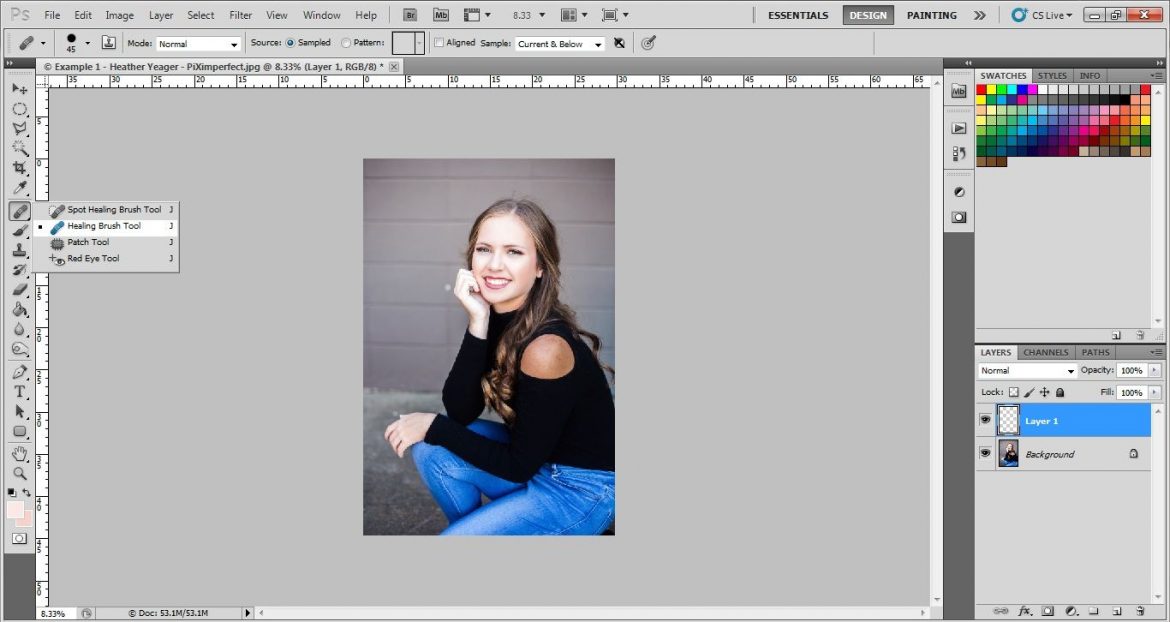
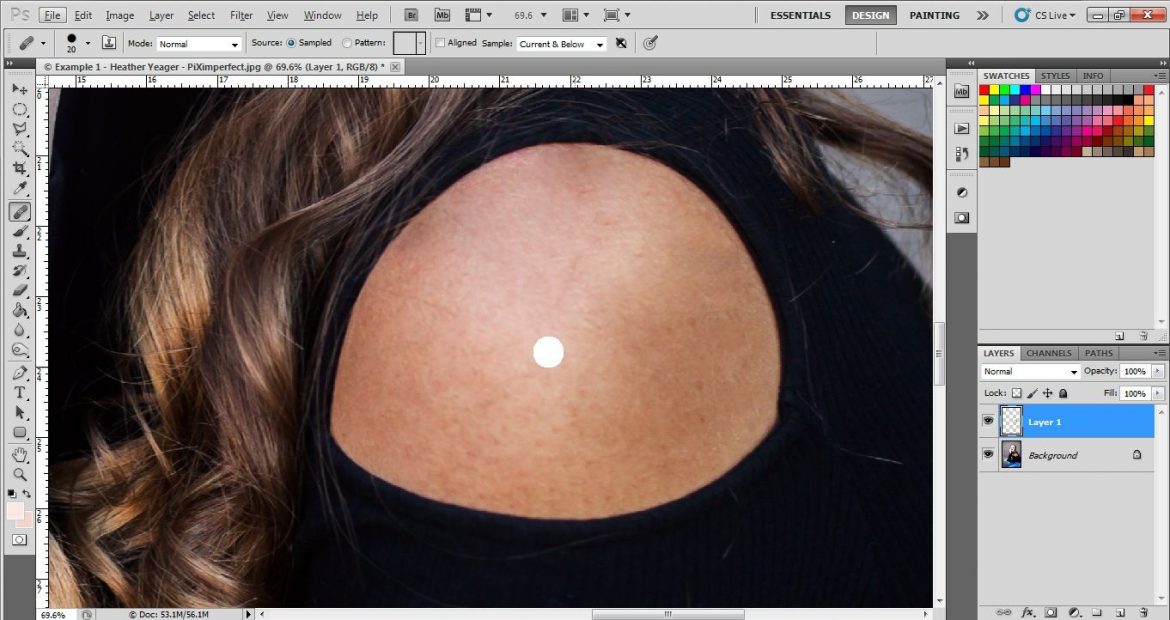
Take Healing brush tool
Most important tool to heal an area of skin is a healing brush tool. Here we will use healing brush tool to remove spots from the skin of the model. You can activate the healing brush tool from the tool bar. It has a Bandage icon. Click on that icon or Press “J” to activate this tool.
Remove Blemishes
Use the healing brush tool to remove the blemishes. You will need to select a source point from where the brush will heal the spots. To pick up a source point press Alt and then click with mouse left button. You will get a source point. Then draw over the area where there are spots and remove them.
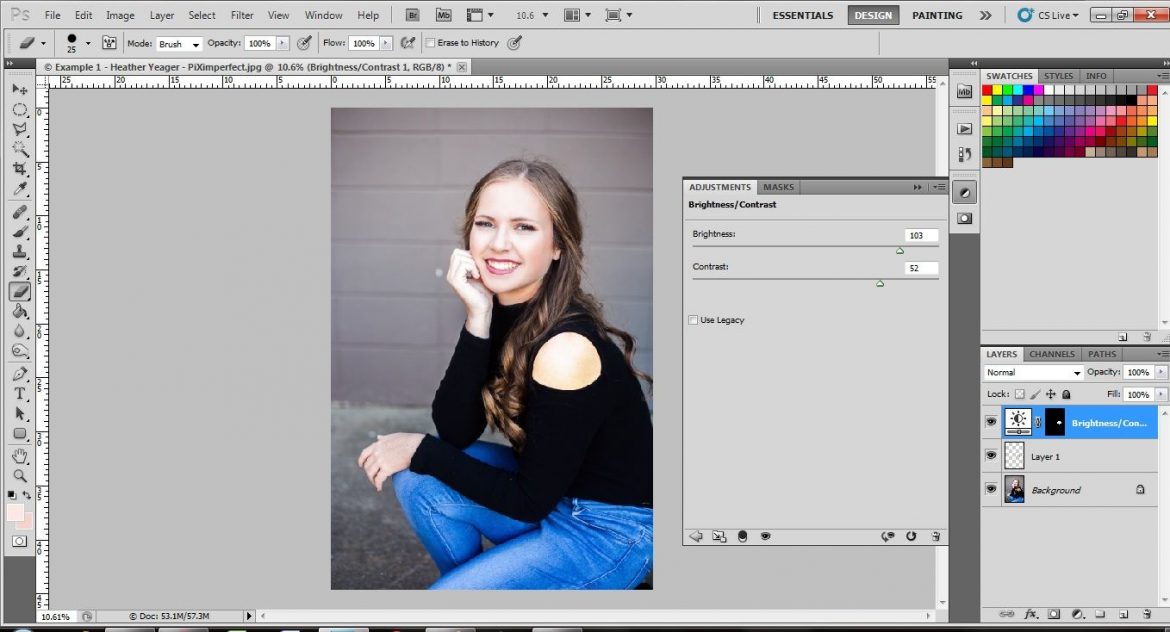
Use brightness and contrast adjustment layer
A brightness and contrast adjustment layer will help you to brighten up the portion of the skin. But it may brighten the whole image for that mask out the portion of the image which you want to brighten up using a layer mask. These ways adjust the brightness with the sliders.
Use Hue and Saturation adjustment layer
Finally by using a hue and saturation layer from the adjustment layers change the hue and fix the saturation so that it looks perfect with the skin. This layer will help you to adjust the skin tone accurately.

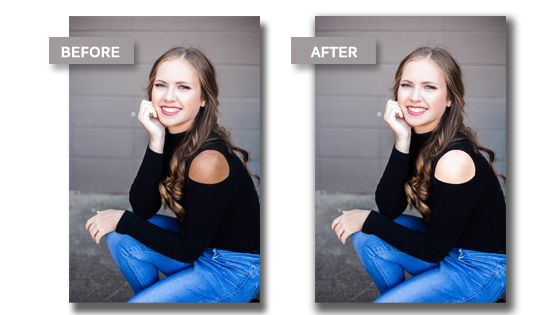
Before vs after
This is the before and after image of skin tone matching process
Conclusion
Note that on the off chance that you are endeavoring to coordinate hues starting with one picture then onto the next, this will possibly work if the overall lighting is comparative crosswise over them. You can’t coordinate hues appropriately if the lighting or introduction or even model’s skin type are definitely unique. I commonly utilize this methodology over various pictures when taking a shot at an article arrangement where the lighting and model have remained reliable.